Quails often do not hatch their chicks themselves, so they are hatched in an incubator. For successful hatching, you need not only to purchase a good incubator, but also to choose the right eggs and save them. Let's look at the rules for incubating quail eggs, how to maintain temperature and humidity, what to do at what stages, and how to avoid common mistakes.
Egg selection
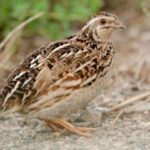
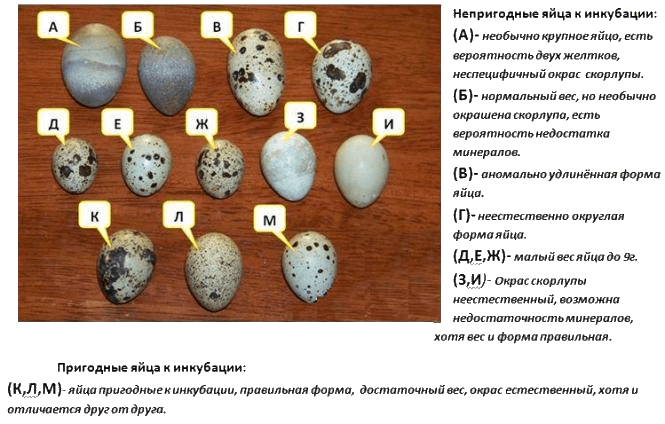
Quail families for obtaining hatching eggs consist of 1 male and 3-4 females. If there are more females, this will lead to a decrease in fertility and the number of chicks.For incubation at home, eggs are selected of medium size, regular oval shape, color characteristic of the quail breed, with a matte surface. The shell should be hard, without sagging or cracks. You should not take too small or large ones. All those selected are tested with an ovoscope or light. Candling can reveal hidden defects such as incorrect size and placement of the air chamber, blood inclusions, and mixed whites and yolks.
Before placing them in the incubator, they can be stored for no more than 1-1.5 weeks at a temperature of 15 ° C; they cannot be washed before storage and incubation. Water washes away the protective film, and bacteria penetrate the eggs.
Bookmark process
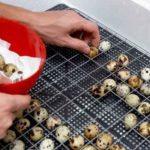
Before placing quail eggs in the incubator, it must be washed and disinfected. Then treat with an ultraviolet emitter for 5-8 minutes, keeping it at a distance of 0.4 m from the surfaces.
After preparation, adjust the temperature, place containers of water and leave for a couple of hours until it warms up.
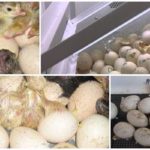
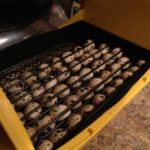
Quail eggs should be laid vertically, with the blunt end up, and in some models - horizontally. The hatching period for quails takes, on average, 17 days. If incubation is carried out correctly, the quail hatch together. But hatching may be delayed by 1-2 days, which is most likely due to a violation of the incubation regime or the fact that the quality of the eggs was initially low.
Correct humidity
Humidity in quail incubation is not as important as when hatching ducks and geese, but it still needs to be maintained at a sufficient level.Dry air at the initial stage can lead to water starvation of the embryos, when hatching time approaches - to drying out of the shells under the shell, as a result of which the chicks will not be able to break through the shell.
Conversely, high humidity can help hatching, but during the period of embryo formation it will cause harm - dampness increases the likelihood of developing bacterial infections and mold. From 1 to 15 days of incubation of quails, you need to maintain humidity at 50-60%, from 15 to 17 - 50%, when the chicks begin to hatch - 80-90%.
Temperature conditions during the incubation period
To control the temperature in the incubator, install a thermometer. It should be located at the level of trays with quail eggs in order to record the temperature near them. During the entire incubation of quail eggs, the temperature changes little, only tenths of a degree.


For example, quail eggs should be kept at 37.5-37.7 °C for the first 15 days, at 37.2-37.5 °C for the next 2 days, and at hatching at 37.0-37.2 °C. This scheme is recommended by most poultry farmers.
Stages of incubation and day of hatching of chicks
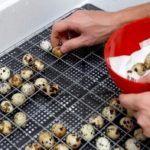
Let us consider in detail for beginners what needs to be done during the development period of quails. In addition to observing the temperature and humidity schedule, the eggs need to be turned over so that the quail embryos inside do not stick to the shell. In addition to turning them over, starting from the 3rd day of the incubation period, you need to spray them and ventilate the incubator. It is convenient to do airing while turning over, if it is done manually. If automatically, then 2 times a day, morning and evening.
You need to spray them in such a way that they are slightly damp, but not wet, in this case condensation may appear after closing the unit. You should not start spraying immediately after the incubator is opened, but after a couple of minutes have passed and the quail eggs have cooled.
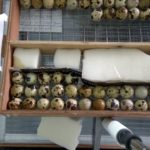
Turning, if you place quail eggs vertically, is done by tilting the trays 45 ° in one direction, and then in the other direction. When loading vertically, eggs are turned 90-180˚.
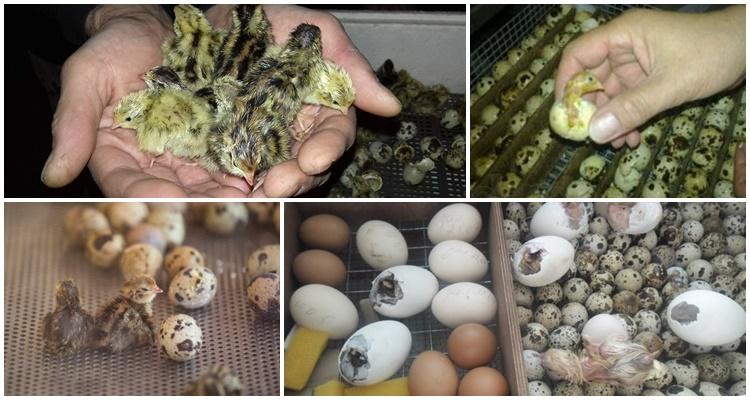
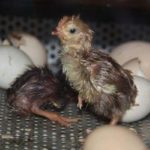
When the hatching time approaches, the chicks will begin to peck at the shell. Removal may take 1-2 days. You cannot help the quails get out of the shell; they must do it themselves. The quail chicks that emerge from the eggs should be left in the incubator until they dry out and the fluff becomes fluffy. After this, they need to be selected from the unit and placed in a brooder with a temperature of 32-35 ° C.
Selecting an incubator
To hatch quails, you can use incubators of domestic or foreign production. They can be used to raise not only quails, but also chicks, goslings, ducklings and other poultry chicks. The main thing is that there are trays with recesses of the right size.
The following requirements apply to devices:
- ease of use;
- automated work, in order to do almost nothing manually;
- safety for quails;
- high percentage of hatchability;
- acceptable combination of cost and quality.
The incubators “Laying Hen”, “Teplusha”, “Ryabushka”, “Cinderella”, “Ideal Hen”, “Blitz 48”, “Comfort” are popular among poultry farmers.These are compact devices that can hold a small number of eggs, simple in design and cheap in price, which any poultry farmer can afford to purchase. According to poultry farmers, the best incubators are produced in South Korea; they are fully automated and work reliably. Of course, you will have to pay more for them.
Typical beginner mistakes
Choosing an incubation device is important, but you also need to know how to avoid possible mistakes. Each of them can lead to the death of chicks at any stage of development or during hatching.
First of all, this is a violation of the temperature or humidity regime, irregular turning, improper spraying. Quail embryos can stick to the shell or suffocate during the hatching period from lack of oxygen and excess carbon dioxide. This problem can be determined by the fact that the chick lies in the egg with its head towards the sharp end. This often occurs due to increased temperature and insufficient cooling. In such conditions, quails hatch prematurely, they are small and sickly, and may die in the first few days.
You can understand the mistakes if you evaluate the quails that died in the eggs. With each subsequent bookmark you will gain an understanding of what and how to do correctly.
Incubation of quail eggs is often the only way to get quail at home. To do this, you need to have a small incubator, fertilized eggs and know the rules of incubation.