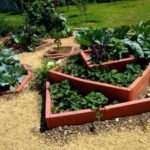
Each garden plot has its own characteristics that influence the development of cultivated plants. One of the most unpleasant problems that gardeners face is the proximity of groundwater. Increased humidity in the area of the root system of fruit crops leads to slow growth of plants and their complete death in the future. Arranging high beds allows you to correct the situation.
When is the best time to do it and what to plant?
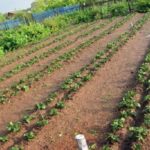
Bulk beds on the site can solve several problems at once.Firstly, the roots of the plants will not constantly come into contact with water and, as a result, be damaged. Secondly, seeds and seedlings can be planted 2-3 weeks earlier due to the fact that the raised soil warms up faster with the arrival of the first warm spring days. In this case, harvesting begins much earlier than when growing crops in conventional beds.
When planning to arrange raised beds on your site, it is worth figuring out when is the best time to start work. Experienced gardeners recommend starting the process at the end of summer, in which case the structure will become stable by spring, and biological processes will take place in its filling, which will ensure high yields.
Bulk beds are also created in the spring, but in this case the gardener will not notice a big difference in the number of harvested fruits, since the organic matter that fills the structure needs time to rot and begin to release useful substances into the soil.
If you install arcs on the row and stretch plastic film, you can get early seedlings.
Selection of materials
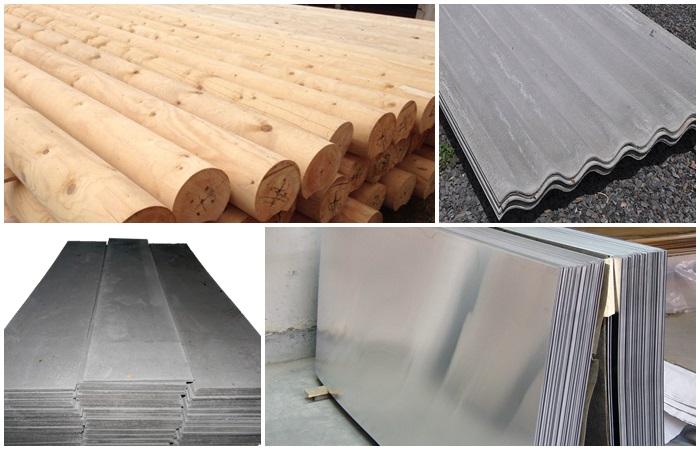
To build raised beds on a personal plot, different materials are used; each option has its own advantages and disadvantages, so when choosing, they focus on what is more suitable for a particular garden and the crops grown.
Gardeners who have been using raised beds for more than one season recommend paying attention to materials such as:
- boards;
- hewn logs;
- slate;
- plastic panels;
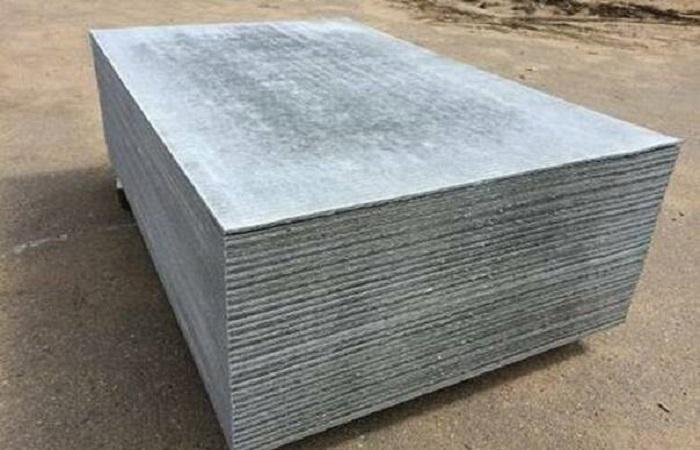
- galvanized metal;
- stone and brick;
- asbestos cement strips.
Dimensions and drawings
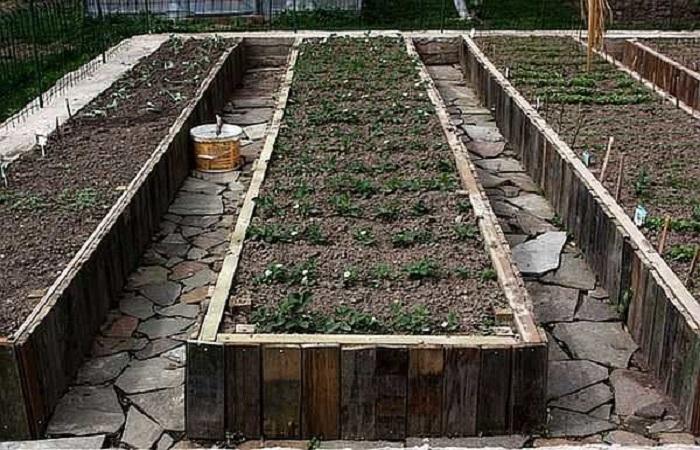
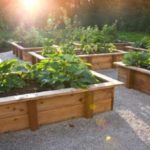
When choosing sizes for high beds in the country, first of all, they are guided by the area of their plot. As a rule, the length of the structure should not exceed 1.8-2 meters, and the width - 1 meter, this is necessary so that it is convenient for a person to care for planted crops without stretching his arms too much. The height of the sides is about 30-40 cm. If a gardener plans to make beds from industrially produced blocks, then it is worth first calculating how many products will be needed to create the structure.
Before starting work, it is recommended to make a drawing on paper to indicate the location of the beds, their sizes and see if the plants will be in the shade most of the day.

How to make warm beds with your own hands
The process of creating raised raised beds depends on what material is chosen for construction. The work follows step-by-step instructions so that the structure will last for many years and allow you to harvest a large harvest.
Flat slate
Arranging high beds made of slate is important in areas with infertile soil; in this case, it is possible to fill the boxes with suitable soil and grow fruits for your own consumption. The advantage of this material over wood is that it is not subject to rotting, so it will last much longer.
Step-by-step instructions consist of the following steps:
- The material is cut into plates of the required size.
- Using a rope with pegs, mark the contours of future beds and dig a trench to a depth equal to half the plate.
- Water generously and install slate sheets.
- They are reinforced on both sides with pieces of reinforcement or pegs.
- After this, the slate is slightly pressed into the ground and the trench is covered with earth.
DSP
Some gardeners prefer cement bonded particle board when creating warm beds. In appearance it is not inferior to slate, but, unlike it, it is an environmentally friendly material.
In order for the DSP structure to last as long as possible, it is necessary to carry out all the work correctly:
- The panel is sawn into the required lengths.
- Pegs are prepared using reinforcement or a profile pipe; their height is 30 cm plus the height of the planned bed.
- The pegs are painted to protect them from corrosion in high humidity conditions.
- Using stakes and a stretched thread, assemble the structure, starting from the long side.
- Along a stretched thread, pegs are driven into the ground at a distance of 1 meter.
- Using galvanized self-tapping screws, attach the pieces of the slab to the pegs.
- To give the structure additional strength, tighten the corner joints with corners.
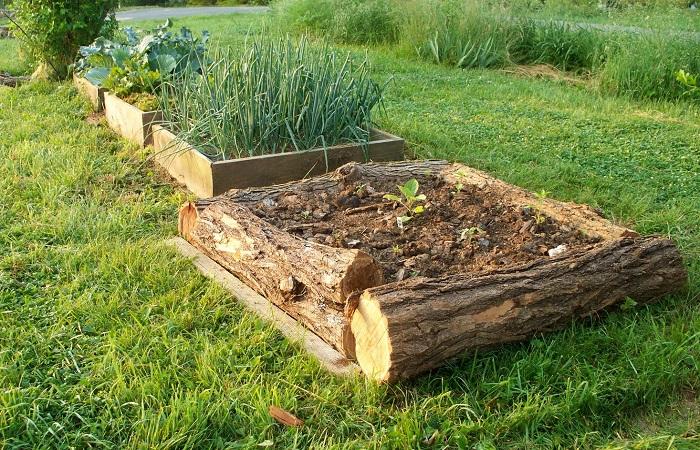
From logs
Beds made from logs are quite stable and durable. If you pre-treat the wood (paint or whitewash), the structure will last for more than one season. Long logs are connected to each other using boards.
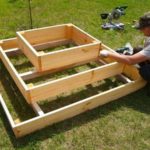
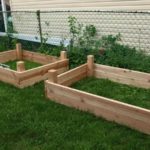
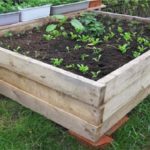
From boards
With the help of wooden boards, not only ordinary warm beds are created, but also multi-level structures.
Wooden options for growing are prepared according to the following instructions:
- Wood processing.The boards are cut to the planned dimensions, after which each part is coated with antiseptic impregnation on all sides. To prevent harmful chemical substances from penetrating into the soil, cover the side that will come into contact with the ground with film. The timber is sawn into 50 cm pieces and also coated with a moisture-proofing agent. All pieces are laid out in one layer to dry.
- Preparing the site for the structure. Mark the boundaries of the future bed and dig it with fine grass, this will improve the permeability of the soil.
- Frame assembly. The prepared boards are knocked down in pairs into panels and connected to each other using cut bars. The long sides are additionally reinforced in the middle with the same bars.
- Installation. The finished frame is transferred to the place where it is planned to lay out the bed, and installed according to the markings. Make small recesses for the legs and check with a level how level the structure is.
If you plan to grow seedlings or heat-loving crops in the garden, install arcs and stretch plastic film. With the arrival of warmth, the shelter is removed.
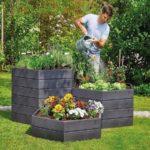
Thanks to multi-tiered beds, it is possible to save space on the site and use several planes at the same time. The low frame is made the largest, the subsequent frames are made in descending order. The parts are fastened together using reinforcement or self-tapping screws.
Plastic
There are special PVC tapes on sale that a gardener can cut into the pieces he needs. You can also purchase multi-colored plastic and make several beds in different colors. Fragments of the tape are connected to each other with a regular stapler and installed in trenches prepared in advance, after which they are sprinkled with earth on both sides and compacted so that the structure is stable.
Arrangement of beds
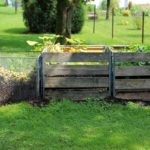
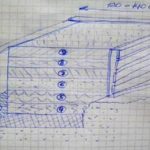
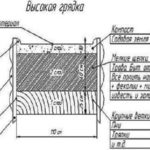
After the structure is installed, they begin to prepare it for planting. Be sure to lay a fine-mesh mesh on the bottom and nail it around the perimeter, this will prevent damage to the root system by rodents. Geotextiles are placed on the mesh, which will prevent weeds from germinating.
After this, the following materials are laid in layers:
- tree bark, small branches, wood shavings;
- compost or rotted manure;
- fallen leaves and grass;
- mineral fertilizing;
- fertile soil.
The thickness of each layer should be about 10 cm. After this, the soil is watered generously and left for several days. During this time, all layers will settle a little and become denser. It is recommended to cover the top of the bed with black film so that the earth warms up faster.