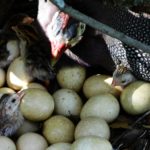
The eggs and meat of these birds contain many useful substances and microelements. The problem is that guinea fowls, whose maternal instinct is weakly expressed, often leave their clutches to the mercy of fate. Therefore, farmers prefer to hatch chicks using the incubation method. At the same time, the process of incubating guinea fowl eggs requires a careful approach, since if the temperature or humidity level is violated, the entire procedure will be in vain.
- Pros and cons of incubation
- Selection and storage of material at home
- Signs of unsuitability
- How to prepare incubation material for laying?
- Incubation modes
- Checking embryo development and candling eggs
- Step-by-step instructions for the entire process
- Ripening time
- Aftercare of guinea fowl chicks
- The most common mistakes
Pros and cons of incubation
Incubating guinea fowl has its advantages and disadvantages. The main advantage of this procedure is that it ensures a regular supply of fresh eggs and meat from these birds in large quantities. However, such an activity requires a lot of effort and responsibility. It is necessary to constantly monitor all indicators, that is, monitor temperature, humidity, stages of embryo development, and turn over on time.
The degree of control depends on the quality of the equipment, but even the most modern incubator requires attention to setting for 1.5-2 hours a day.
An important advantage of incubation is that the survival rate of young animals is 70-75 percent of the planted material. In general, breeding guinea fowl in this way is a profitable and profitable business, both in home breeding conditions and on an industrial scale.
Selection and storage of material at home
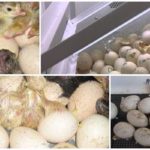
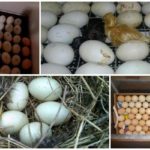
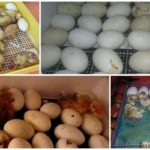
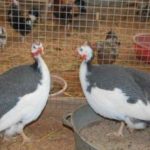
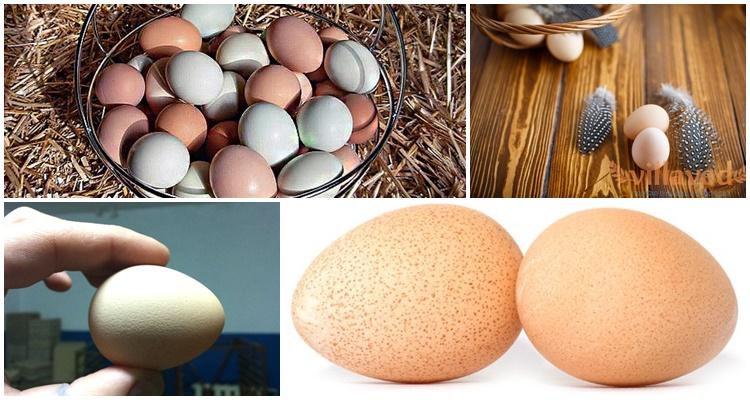
For incubation purposes, eggs are selected from laying hens that are 7-9 months old. The optimal weight varies between 40-45 grams. Safe storage can last for 10 days, but no more. Eggs are stored in this form: vertical position, the sharp end is located at the bottom. It is necessary to observe the temperature regime, monitor humidity (at least 80 percent) and lighting. Do not allow sunlight to enter the room where the incubation material is stored.
Before selection, the birds are fattened using fish and meat waste. Before placing eggs in the incubator, each of them must be cleared and checked for unsuitability.In order for the chicks to be hatched at the same time and for them to develop normally, the mass of all eggs should be approximately the same.
Signs of unsuitability
Eggs that have the following characteristics are not suitable for incubation:
- weight is less than 35 grams;
- the shape of the eggs is irregular;
- there are cracks, growths or other defects on the shell;
- blood clots can be seen inside the shell;
- the presence of two embryos in one egg;
- the shell is more than 50 percent contaminated.
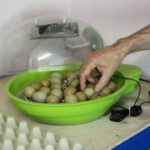
How to prepare incubation material for laying?
Before laying the eggs, they need to be kept in a warm place for 2-4 hours. Trays can only be placed when the incubator reaches 38 degrees (in most cases). At this stage, small embryos are separated from large ones and placed in different trays. If the shell is less than half dirty, the surface must be cleaned and only then placed in a container.
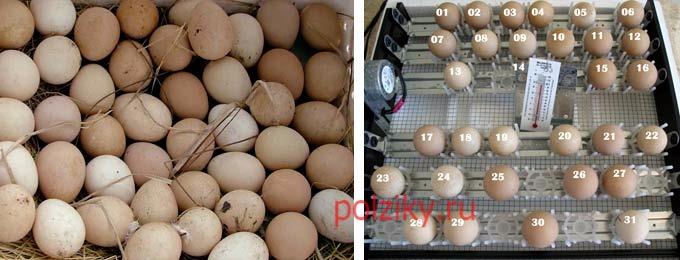
Incubation modes
During the first two weeks, temperature and humidity levels should be 37.8 degrees and 60 percent, respectively. Subsequently, the temperature is reduced by 1-2 tenths, and the humidity is reduced to 50 percent. When three days remain before the procedure is completed, the temperature is returned to its original values.
If the device is not equipped with an automatic humidity control system, then to additionally humidify the air, place a container of water in the incubator. Starting from the 6th day from the start of incubation, the material must be cooled by lifting the lid of the device for 5-6 minutes. From the beginning of the third week, the cooling duration is increased to 10 minutes.
Below is a table of the mode and timing of incubation of the material.
| Day | Temperature | Humidity | Number of revolutions | Ventilation |
| 1-2 | 37.8 degrees | 60 percent | 6 | No |
| 3-14 | 37.5 degrees
|
60 percent | 4 | 5-6 minutes |
| 15-23 days | 37.5 degrees | 55 percent | 3 | 10 minutes |
| 24-25 | 38 degrees | 65 percent | No | No |
| 26-28 | 37 degrees | 68 percent, and when pecked up to 95 percent | No | 7 minutes |
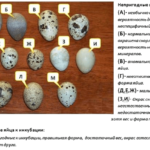
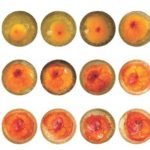
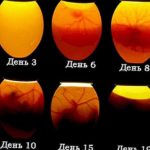
Checking embryo development and candling eggs
During the entire time the embryos are in the incubator, their development is monitored four times. If unsuitable material is found, it must be removed. If the embryo is frozen, then timely removal of the spoiled egg will avoid rotting, cracking of the shell and spreading of the contents.
The first check (ovoscopy) is carried out on the eighth day of incubation. If no signs of development are detected at this stage, then the eggs are likely not fertilized. Such material is removed. During examination, the blood vessels located in the area of the narrow end should be clearly visible. However, the embryo itself has not yet been detected.
If the embryo is located close to the membrane, we can talk about its slow development. The material is translucent in a pale shade, the blood vessels are almost invisible.
The device used to check the egg is called an ovoscope. You can do it yourself. To do this, you will need a small cardboard box and a 60-volt light bulb, which is placed at the bottom of the container. An oval hole is made in the lid. The size of the latter should be slightly smaller than the size of an average egg. The second examination is carried out on the 15th day. Material with obvious bloody clots on an orange background is rejected. The embryos are checked a third time after 24 days. At this stage, a frozen embryo is easily detected. Such eggs must be removed from the incubator.When pipping appears, the embryos are sprayed with water to increase humidity.


Step-by-step instructions for the entire process
The basic rules that must be followed as the embryos develop are as follows:
- Each egg heats evenly.
- Overheating is avoided. If the embryo shell is hot, the cooling system must be turned on.
- Ventilate the material.
- Perform ovoscopy.
- Turn eggs. The procedure is necessary for uniform heating, as well as to reduce the likelihood of embryos sticking to the walls of the shell.
Ripening time
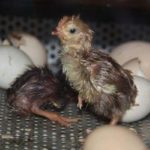
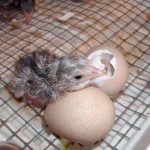
The chicks are hatched in an incubator after 26-28 days. Interestingly, young guinea fowl hatch seven days later than chickens. Over the entire period of incubation hatching, the weight of eggs decreases by 15 percent of the initial weight.

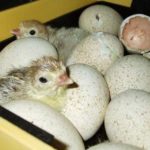

Aftercare of guinea fowl chicks
The first thing to do after the appearance of the young is to carefully select the chicks. Healthy guinea fowl weigh 30-34 grams. Two days later the birds are already standing on their paws. Signs of unhealthy offspring:
- deformation of the cloaca and umbilical ring;
- dull eyes;
- underdeveloped beak.
The most common mistakes
Common mistakes made by inexperienced farmers when breeding guinea fowl are:
- setting the same incubation regime as for chickens;
- untimely turning over;
- lack of moisture;
- overheating of embryos;
- underheating of eggs;
- incorrect temperature determination.
Breeding guinea fowl by incubation is a rather complex, but effective and profitable activity. During the development of embryos, it is necessary to follow a regime and regularly inspect the material for flaws.