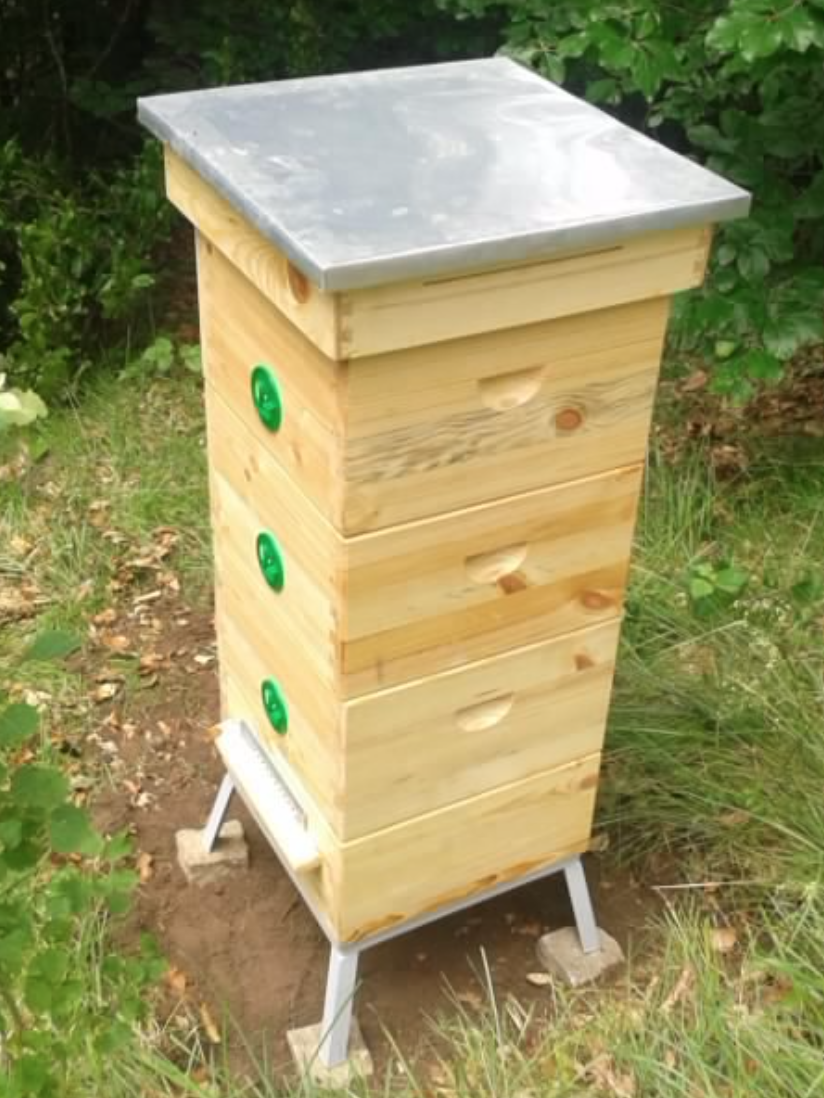
Properly made bee hives allow you to successfully breed insects and get a lot of honey. However, you can buy them or design them yourself. To obtain the required result, it is important to carefully study the drawings and pay attention to the choice of materials. It is also worth choosing the hive design wisely and following the recommendations of experienced beekeepers.
- Primary requirements
- Selection of materials, drawings and dimensions
- What tools will you need?
- How to make a bee hive with your own hands
- Housing assembly
- Installing the bottom and roof
- Preparation of polyurethane foam mixture
- Removing and painting the hive
- Buy or make it yourself?
- Rare bee hives
- Possible problems during construction
Primary requirements
The building for bees must meet the following requirements:
- Have sufficient volume inside to accommodate honeycombs and food.
- Reliably protect bees from the negative influence of external weather factors.
- Easy to transport.
- Provide convenience for the beekeeper.
- It is easy to change the internal volume to suit your needs.
- Have standard dimensions that make it possible to replace the corresponding body elements and internal elements.
- Made from quality materials. To do this, you should use exclusively dry boards that do not have mold or cracks. They should be made from soft wood.
Selection of materials, drawings and dimensions
The structure for bees can be made of the following materials:
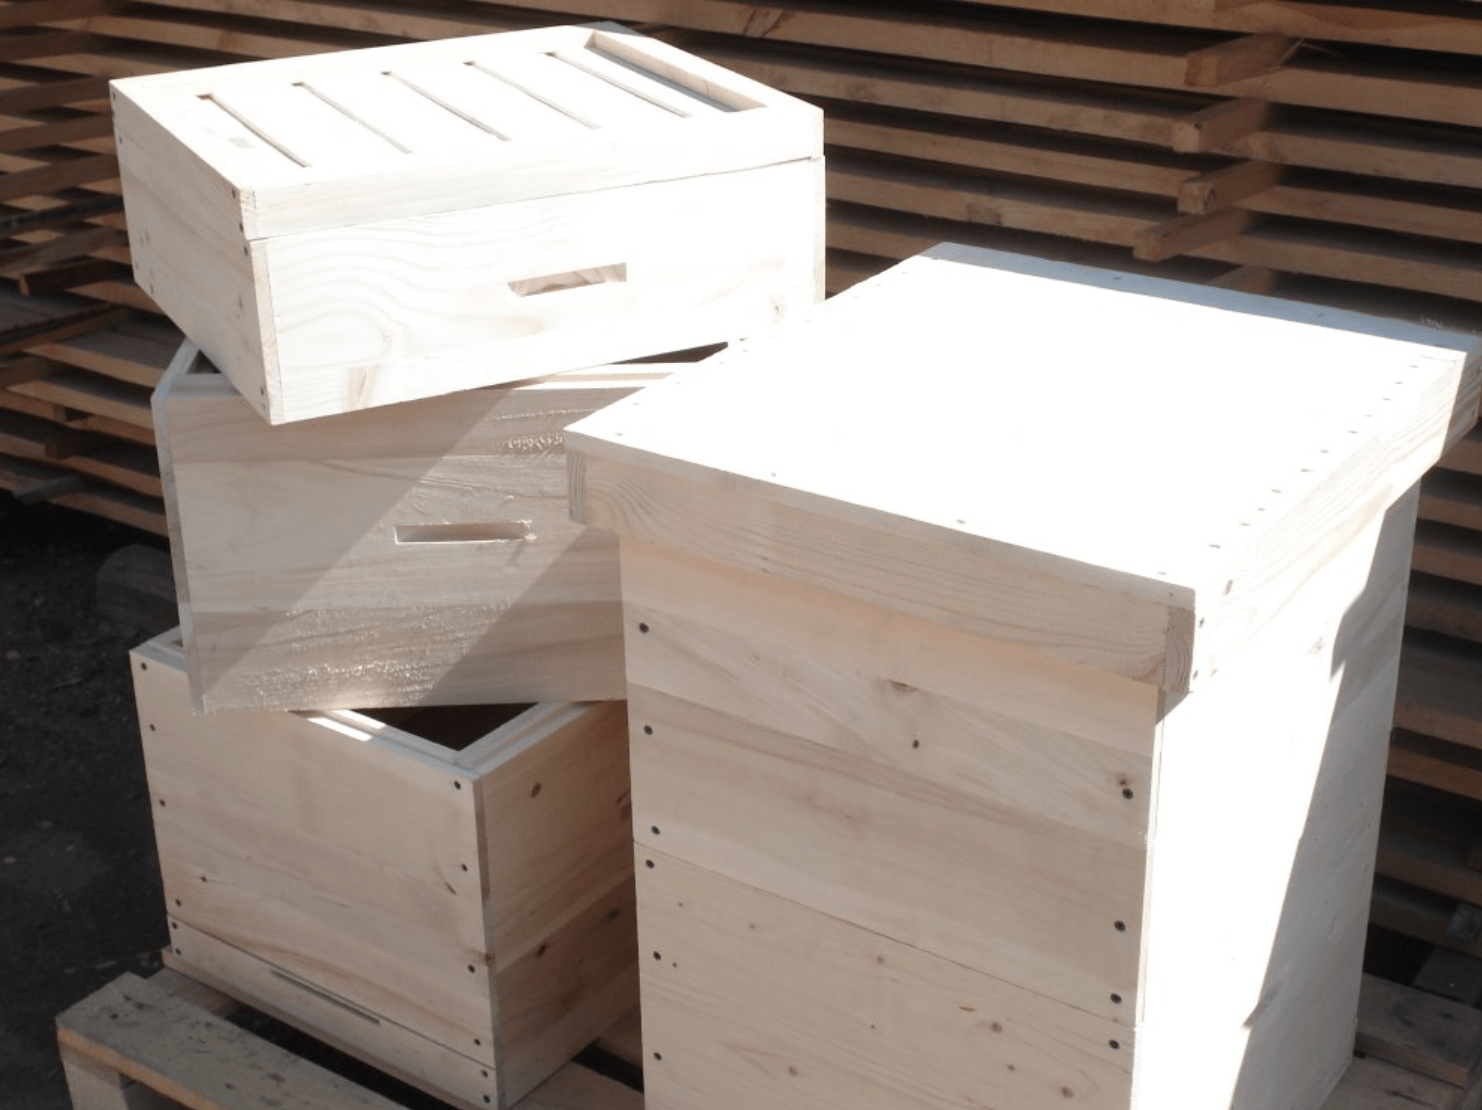
- Wood is considered a classic solution for making bee hives. In such houses, insects feel like they are in their natural environment. Cedar is considered a suitable option for making hives. You can also build a structure from linden or aspen. At the same time, coniferous wood species are cheaper, but bees are not very comfortable in them.
- Plywood - this material is considered durable and environmentally friendly. A house made of such material must be painted and insulated from the inside with polystyrene foam. Only in this case will it be warm and dry enough. However, plywood does not withstand moisture, so it needs to be properly cared for.
- Expanded polystyrene - this modern material is often used by beekeepers to build hives. It has an affordable price and does not require insulation in winter. The disadvantage of expanded polystyrene is its increased fragility.
- Polystyrene foam is considered the most economical solution. Its advantage is its lightness.In addition, the material is characterized by excellent thermal insulation. The downside is the fragility of the substance. In addition, it needs to be painted all the time to protect it from the effects of the sun.
- Polyurethane – characterized by excellent thermal insulation properties. The substance does not rot or decompose. Fungi and bacteria do not accumulate in it. Also, the material does not allow moisture to pass through and does not accumulate it inside. The downside of polyurethane is flammability. The substance also requires ventilation because it does not allow air to pass through.
When drawing up a hive diagram, it is important to consider many factors:
- climatic features of the region;
- products that the apiary will produce;
- place for wintering;
- improvised materials.
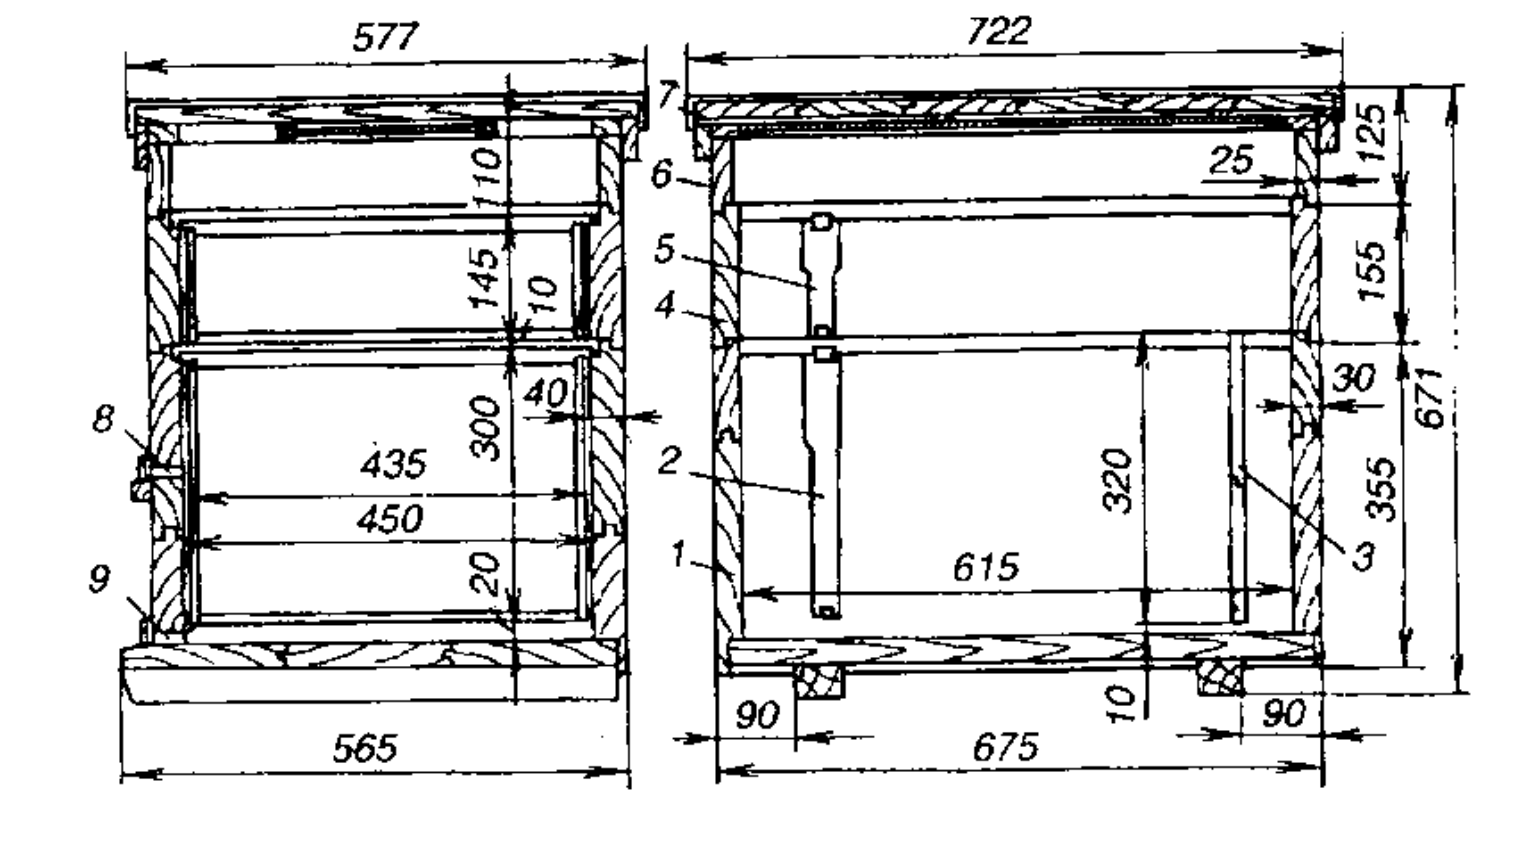
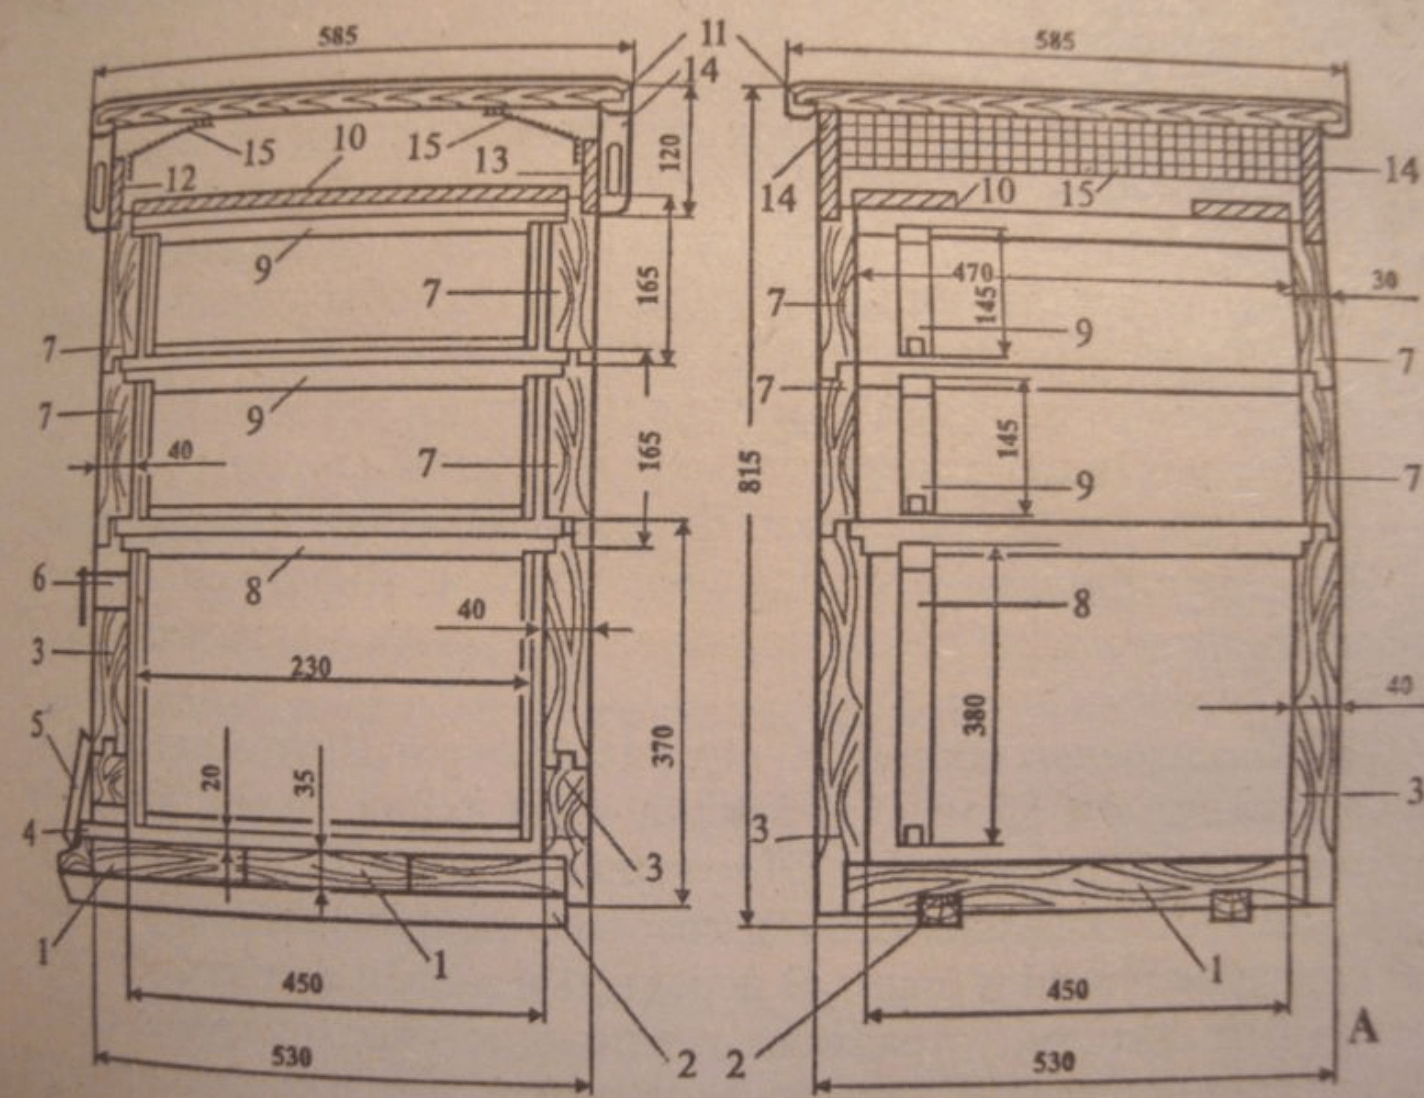
Below are many drawings, so choosing the appropriate option will not be difficult. One of the popular solutions will be the design developed by the famous beekeeper Mikhail Polivoda. For its construction, it is permissible to use wood materials that have already been used, and even waste from furniture production. At the same time, a minimum of tools is required for work. The hives are small, so they can be easily transported.
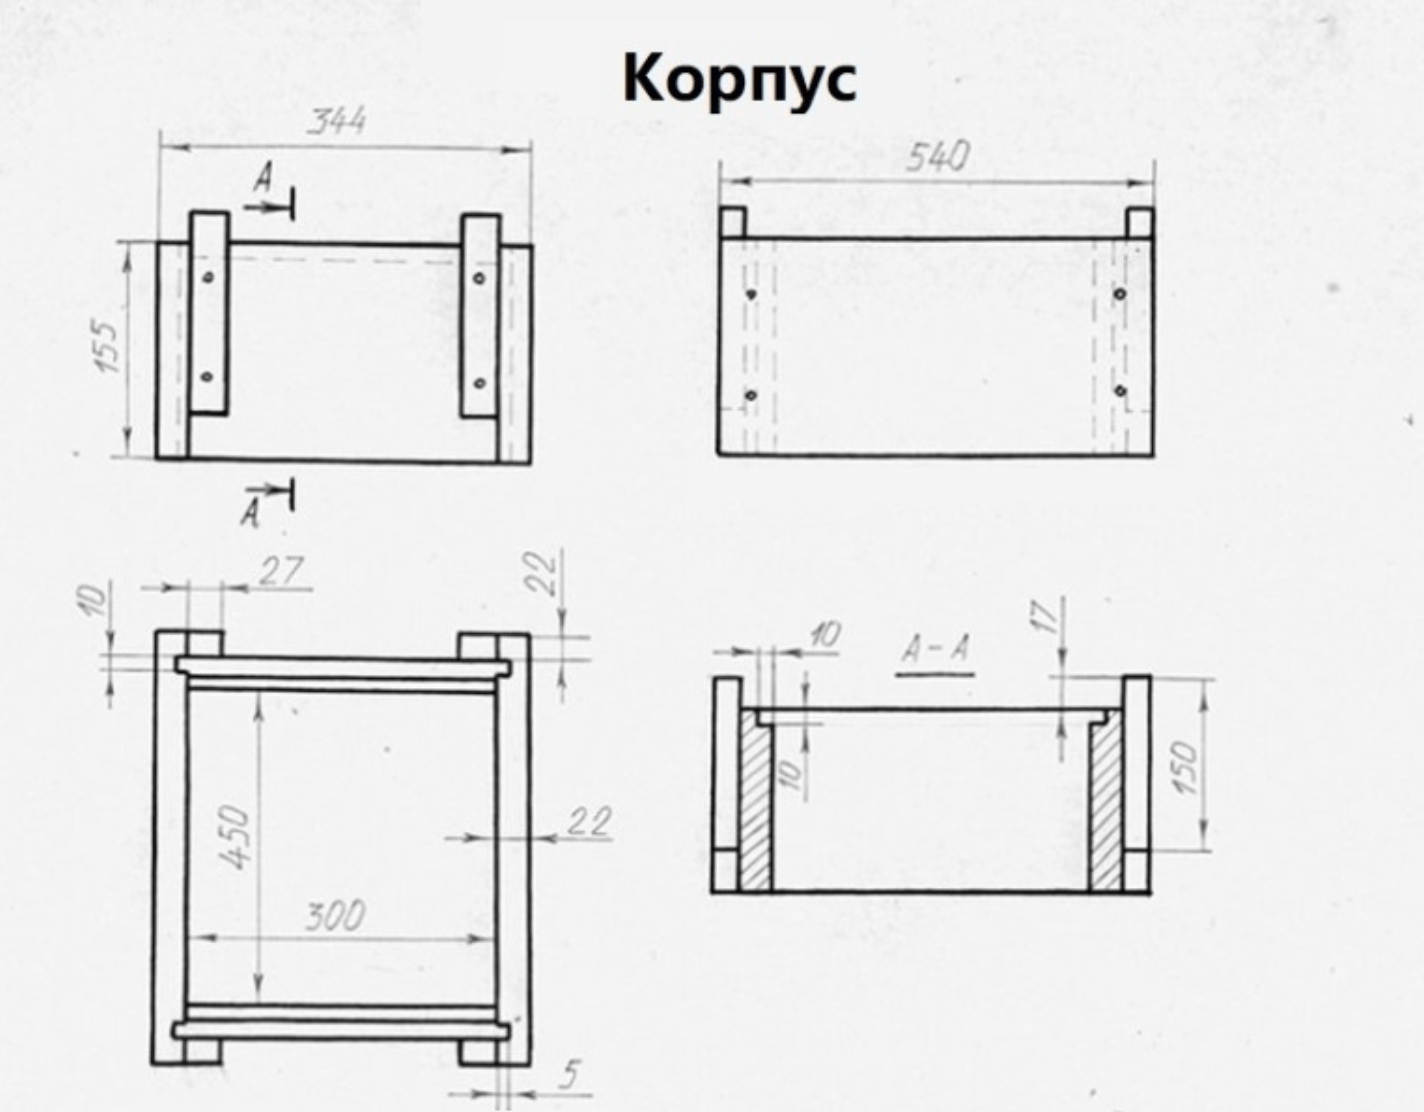
The simplest design proposed by Polivoda is a horned hive. It received its unusual name due to the presence of connecting metal parts that protrude outward. The housing for bees is simple and multi-tiered. One section includes 4 boards knocked into frames. Their thickness is 23 millimeters and their width is 156.
The sections are fastened to each other with beams measuring 23x28 millimeters. They protrude 23 millimeters from above, and do not reach 18 millimeters at the bottom. After fixing the bars, it is possible to create a solid and durable frame that can withstand increased loads.Inside, the hive is quite large in size - 452x305 millimeters. At the same time, the joints of the structure are made quite dense. This is achieved through end folds from the edges of the boards. Sometimes they are not used, but small bars are installed. They give additional strength to the entire structure.
What tools will you need?
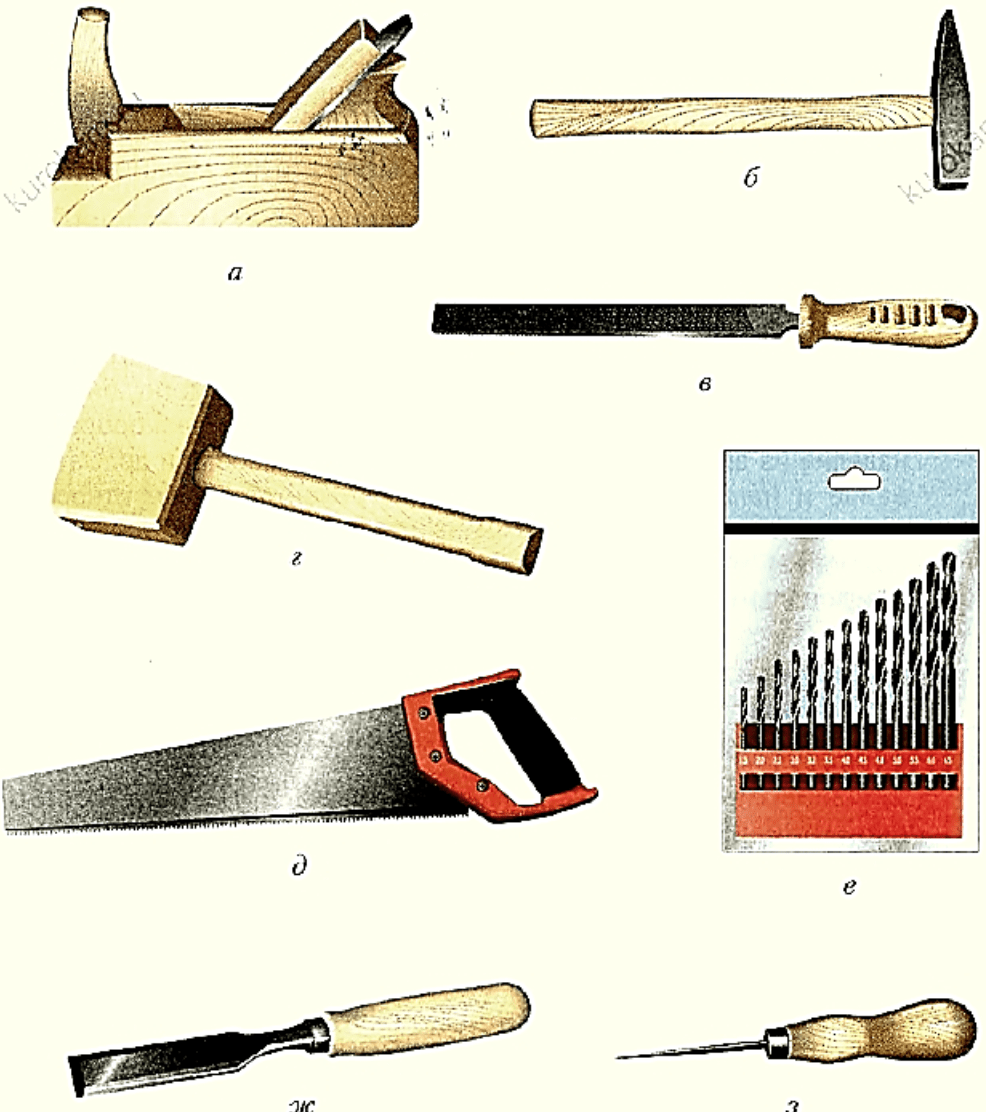
To make a hive from boards or other products, you need to prepare everything you need. After selecting materials, care should be taken to prepare the tools. The following should be applied:
- axe;
- hammer;
- drill;
- jointer;
- bit;
- plane;
- marking tool;
- corner spikes;
- PVA glue;
- nest frame;
- electrical tools.
How to make a bee hive with your own hands
The construction of hives is considered a rather complex process, which should be divided into a number of stages.
Housing assembly
To get a bee house, you need to prepare 8 metal plates. Spacers must be placed between the opposite sides, and the outer plates must be secured with bolts. To make recesses in the structure for gripping, metal plates should be attached to the internal elements of the outer tiles.
It is recommended to make the base and cover with grooves into which the plates will be inserted. It is necessary to apply metal strips along the edges and fasten them with bolts. It is worth making holes inside and outside. This will make it possible to insert threaded metal rods inside when assembling the structure. Bolts can be screwed to them to hold the entire structure.
Installing the bottom and roof
To make a roof, you need to use 2 rectangular parts, one of which should have protruding sides along the edges, and the second should have a rectangular inner part.
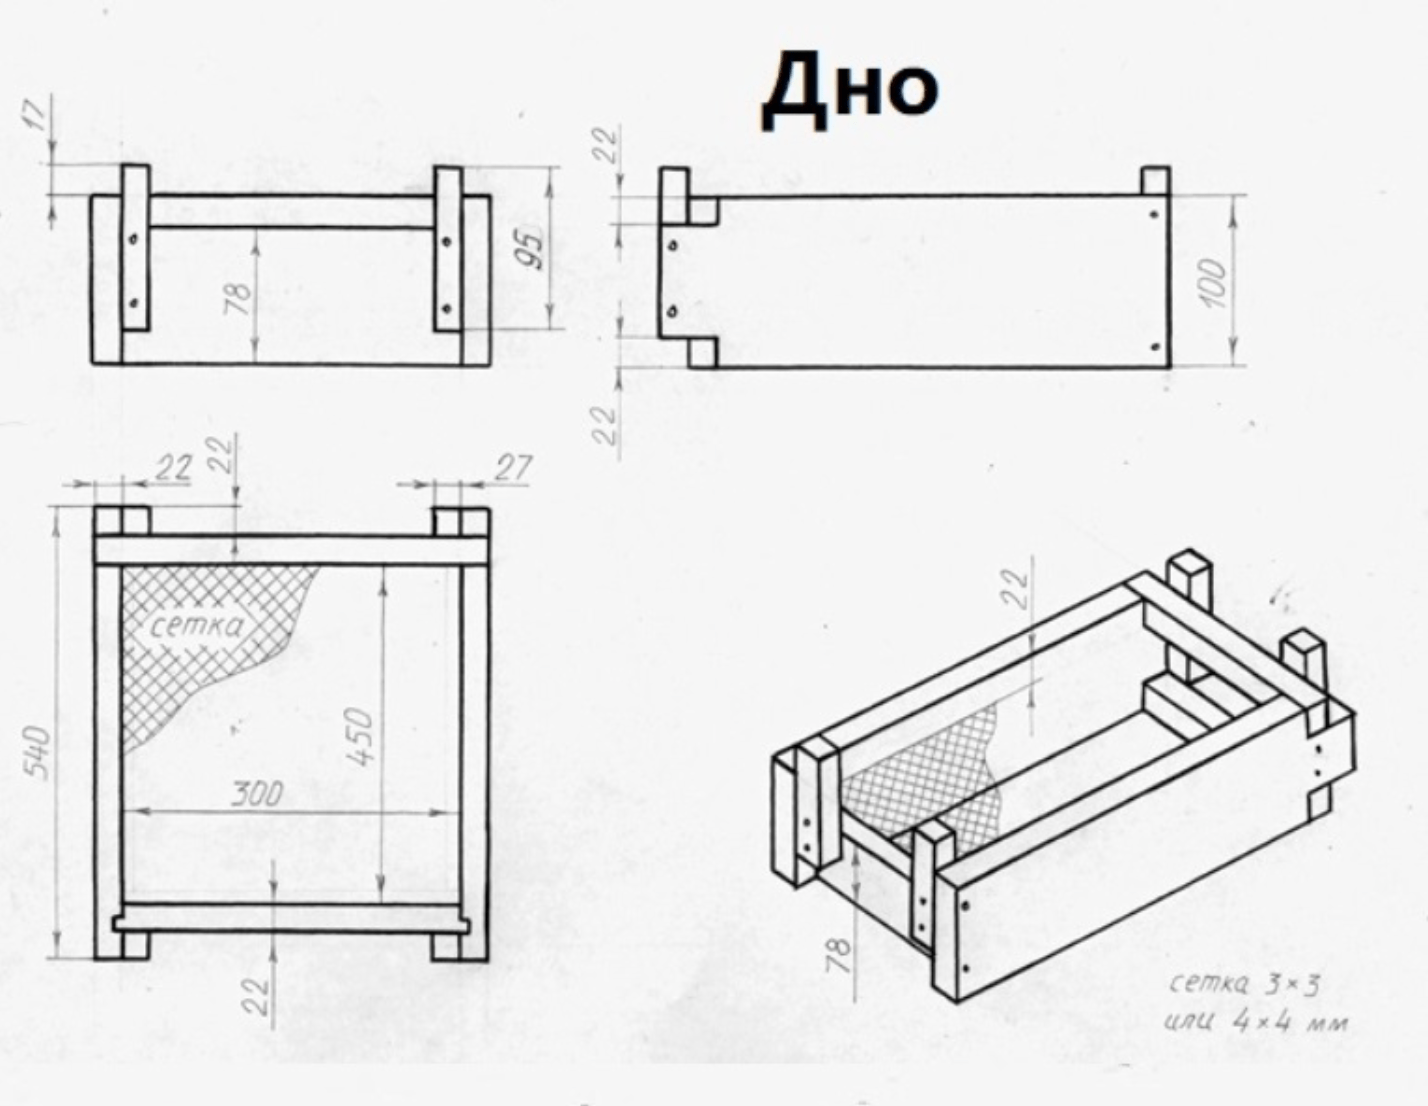
The bottom is a rectangular frame, in the center of which there is a metal mesh. It is best assembled from separate polyurethane foam beams and connected with bolts. Separately, it is required to design forms for the beams.
A metal strip should be placed along the inner perimeter of all the bars. It is needed to form folds. It is worth placing a metal mesh on them and nailing them with a stapler. In this case, it is recommended to place the front bar lower. This will help create a tap hole.
After casting, make a groove in the inner sidewalls. It is necessary for the bottom valve. It needs to be made of polycarbonate. The rear bar should be placed lower. Thanks to this, it will be possible to insert the valve into the slot and guide it into the grooves of the side walls.
Preparation of polyurethane foam mixture
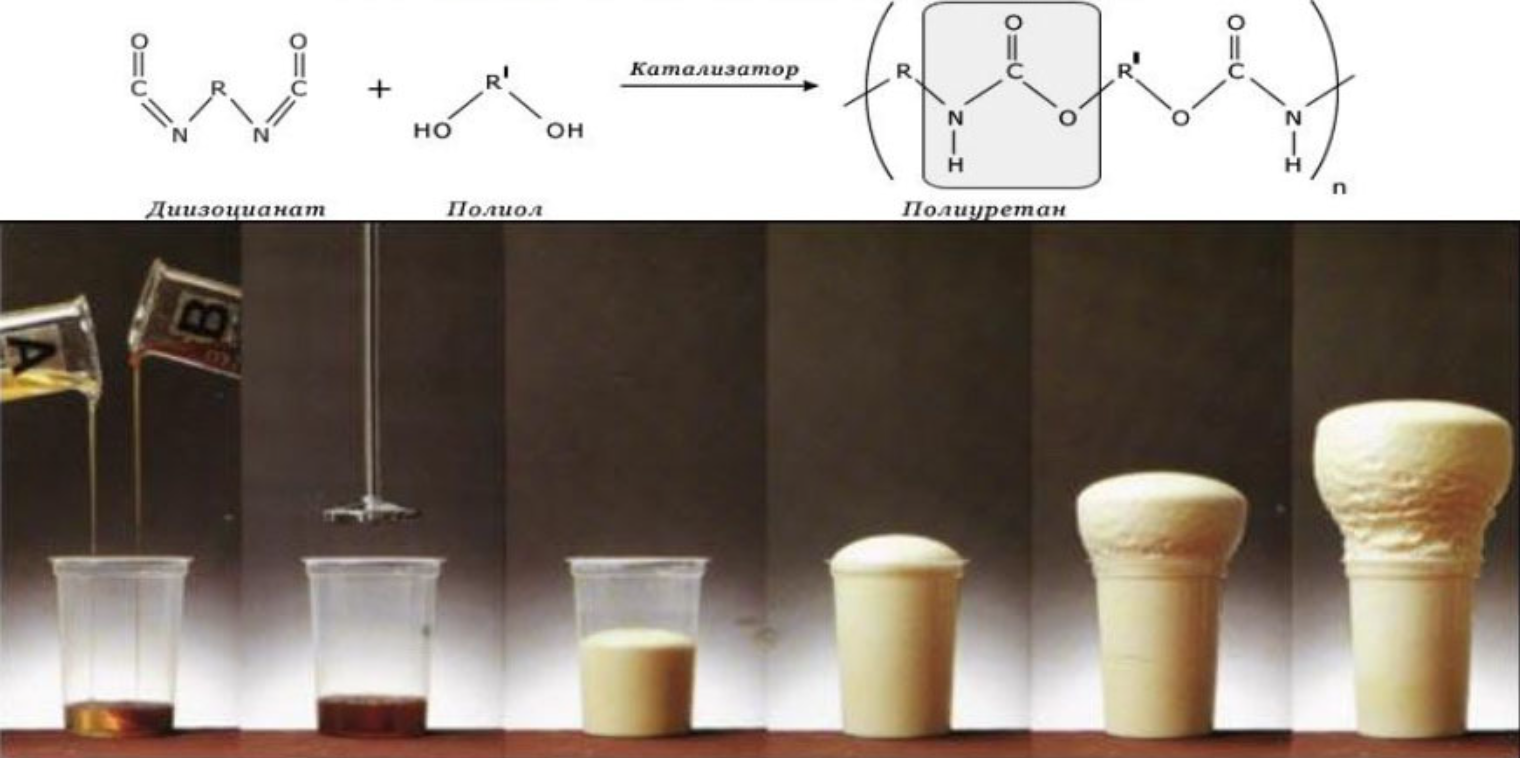
This material is a result of the reaction of a polyisocyanate and a polyol. When pouring the mixture, it is worth correctly calculating the total amount. In this case, you should adhere to the following order:
- Determine the volume of the hive parts and multiply it by the width, length, thickness.
- Multiply the resulting parameter by the process loss coefficient, which is 1.15, and the density of polyurethane foam. Its value is 60 kilograms per 1 square meter.
Typically, this 1 hive body, which is 5 centimeters thick, requires 1.7 kilograms of polyisocyanate and 1.5 kilograms of polyol. The composition must be poured quite quickly - within 10 seconds. The fact is that it hardens very quickly.
To mix and pour, you should use special devices or an ordinary construction mixer.In the second case, you need to pour the polyisocyanate into the flexible container and immediately mix it using a mixer. Then add the polyol and stir for 3 seconds. The finished composition can be poured into a mold.
Removing and painting the hive
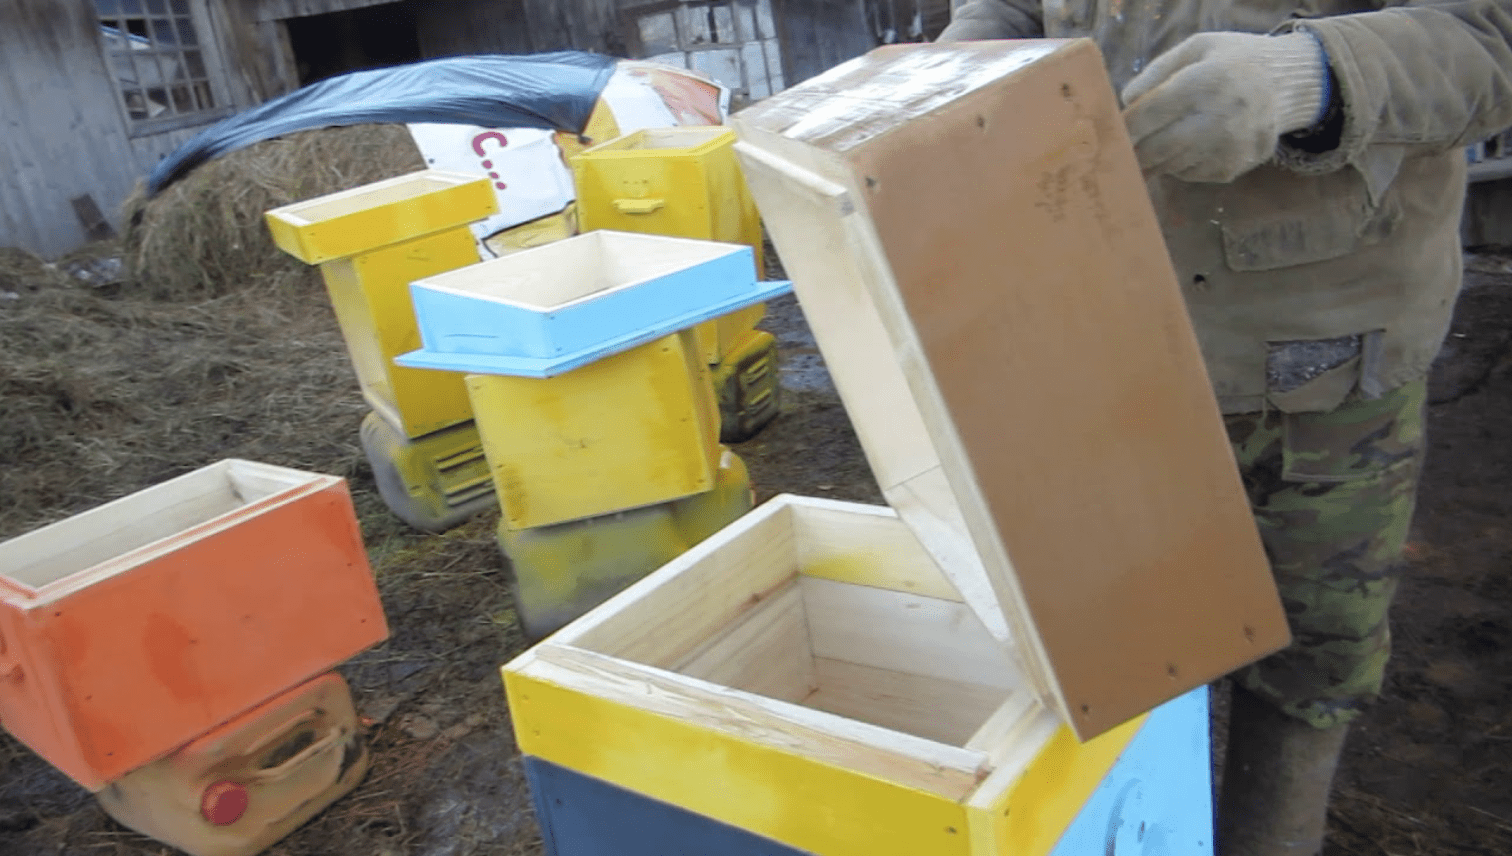
It takes half an hour for the composition to harden. After which the bolts that hold the rods need to be unscrewed. It is recommended to knock down the top of the form using a wooden block and a hammer. After this, you need to unscrew the bolts on the ribs of the form, acting as carefully as possible to avoid deformation of the device. Thus, you need to make 2 circles around all the bolts and remove the spacers. Excess polyurethane foam around the edges of the body should be removed with a sharp knife.
Finally, the structure should be sheathed with fine-grained sandpaper. Acrylic dye must be applied to the facade, which will protect the homemade hive from ultraviolet radiation. Painting the house must be done within 1 week after the construction of the structure. But this is allowed to be done no earlier than after 8 hours.
Buy or make it yourself?
There is no clear answer to this question. First, you need to decide on a solution to the problem and calculate the costs. If the goal is to make honey for yourself, then purchasing tools and materials will significantly increase the costs. In addition, building a bee house with your own hands is not easy, and it takes a lot of time.
If carpentry is established and some capacity is available, you need to think about it. It is important to prepare high-quality drawings. To fit all structural elements, a high degree of skill will be required. That’s why many beekeepers still buy factory hives.
Rare bee hives
Sometimes in the professional literature for beekeepers there are unusual names for hives - Roger-Delon, Alpine, Varre. At the same time, experienced beekeepers advise thinking carefully before trying to make such a structure. Despite the positive reviews, it is important to understand that such structures may not be applicable in reality. Therefore, the information received should be used to form a general outlook.
Unique designs can create serious problems with the unification of equipment and nesting frames in the apiary. Neither honey extractors, apiary carts, nor wax melters are suitable for them. Therefore, rare types of hives have not become widespread. The main reason for this is considered to be difficulties with maintenance.
Possible problems during construction
When building hives, many novice beekeepers face various problems. To avoid them, you need to adhere to the basic recommendations of professionals. Key tips include the following:
- It is advisable to make the bottom of the structure removable;
- the roof should be made flat - this will make it easier to transport the structure;
- It is recommended to complement the frames with side strips;
- It’s definitely worth making a feeder for a bee colony;
- It is recommended to assemble the roof only after completing the process of insulating the home;
- the structure must be made airtight.
Making a beehive with your own hands is quite possible. To do this, you need to choose the right tools and materials and strictly adhere to the manufacturing technology of the structure. However, in some cases, independent production of such a structure is considered economically unprofitable. Therefore, before starting work, it is important to carefully think through and calculate everything.

