Cucumbers are a moisture-loving crop that must be periodically watered and fed when grown in open ground. If you water too infrequently, it can affect the growth of bushes and yield. The fruits themselves may also suffer, becoming tasteless and bitter.
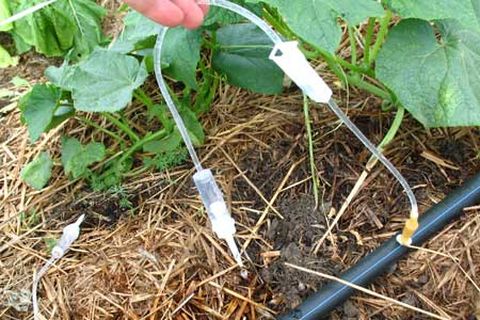
Not all vegetable growers have the opportunity to constantly be in the countryside to constantly water the cucumbers. In this case it is created drip watering of cucumbers in a greenhouse or garden, which will ensure a constant supply of moisture to the plants.For such purposes, watering is created with your own hands from plastic bottles.
Advantages and disadvantages
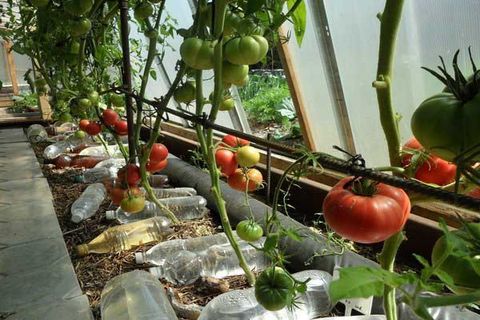
The watering system using plastic bottles is quite simple. To ensure the supply of moisture to the cucumbers, it is necessary to dig a bottle with small holes for water seepage near each bush. This type of bottle watering has a number of advantages, which include:
- Low cost. This system is practically free, since to create it you only need plastic containers, which you can find on the street yourself or purchase at a low price.
- Ease of creation. To set up irrigation with plastic bottles, a person does not need any special skills, so anyone can do this job.
- Simplified care for cucumbers growing in the garden or in greenhouse conditions. To water in a greenhouse through plastic bottles, a person does not have to spend much time at his or her summer cottage. Using this scheme, a person will be able to go about his business and not worry about the plants.
- Protecting cucumbers from burns. Automatic watering of bushes using a drip method protects the leaves on the bushes from burns, since water will flow directly to the root.
- Autonomy. Most popular systems require a plumbing system. In this case, you only need bottles filled with water.
- Fluid temperature. The water used to water the cucumbers has the same temperature as the air in the greenhouse. This has a positive effect on plant growth.
- Easy dismantling and repair. There are times when some element in the system breaks down and has to be completely replaced. To do this, it will be enough to dig up the broken bottle and install a new one in its place.
Despite all its advantages, this irrigation system also has some disadvantages:
- Difficulty in organizing irrigation over large areas. Therefore, if it is necessary to ensure the supply of moisture to large areas, it is recommended to use any other irrigation methods.
- Frequent problems. Often, the holes in the bottles begin to become clogged with soil, and because of this, the flow of moisture into the soil slows down.
- Inadequate watering. Such a system is quite primitive and because of this, it cannot completely replace irrigation in open ground. The gardener will sometimes have to irrigate the bushes himself using a watering can. To ensure proper watering, it is recommended to use special tapes connected to the water supply.
Materials used
Before you start drip irrigation after fertilizing, you need to decide what materials and tools you will need to set up the system:
- roulette;
- shovel for digging containers into the ground;
- an awl or nails to create holes;
- bottles;
- a lighter that will be used to heat a needle or nail.
Particular attention should be paid to the choice of bottles, since they are the main material of the irrigation system. First you need to decide on the volume of containers. In this case, the choice directly depends on the area in which the cucumbers will be grown. If the temperature remains very high throughout the day, then for watering you will need large containers that could hold a sufficient amount of water. It must be remembered that the temperature in greenhouses is higher than outside and therefore the plants will need more water.
It is not recommended to use small volume containers, as this will require you to add liquid to it too often.Therefore, you should abandon half-liter bottles. The best option would be to use two-liter containers, which will last for a week and a half.
However, if the summer is too hot, you will have to use five-liter eggplants so that the bushes have enough moisture. You should think about the possibility of using such a large container in advance, as it takes up a lot of space.
You should also pay attention to choosing the right fabric. It is needed to protect the bottle openings from contamination. To do this, the fabric will have to be wrapped around the outside of the bottle so that soil cannot get inside. It is recommended to choose a fabric that is not very dense so that water can pass through it freely.
To pierce the lids, it is recommended to use needles to make holes about one millimeter in diameter. If they are too large, the water will be quickly used up.
Arrangement methods
There are four main methods by which you can create a bottle irrigation system. Therefore, before starting work, you should familiarize yourself with each of them.
Digging into the ground
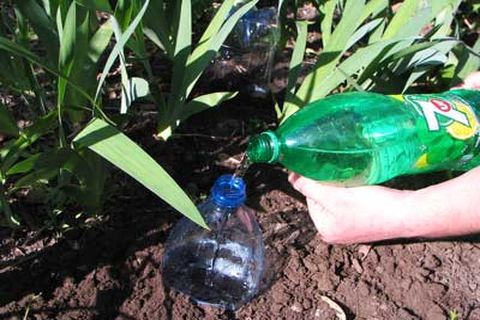
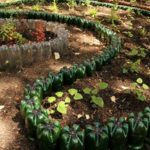
The most common way to arrange irrigation in open ground is to bury containers in the ground with the bottom down. To do this, a small hole with a depth of at least 10 cm is made near each bush, into which the container will be placed. Then, using a tape measure, remove 3-5 cm from the beginning of the bottom of the bottle and make a mark. After this, holes in several rows are created in the marked area using a heated needle. About 10 holes need to be made.
The prepared bottle is carefully wrapped in cloth and placed in the ground upside down. Then it is buried and filled with water. Often, debris and soil fall into the water from above.To solve this problem, you should cover the neck with nylon or cloth.
Digging upside down
This method differs from the previous one in that the container will be placed in the ground upside down. Therefore, holes will have to be made in the lid or neck. To organize watering using this method, holes for containers are made near each bush. At the same time, you need to make them a little less than last time. Their depth should be equal to the size of the container neck.
Having finished creating the holes, you can begin preparing the containers. Using a well-heated nail, you need to make 5-10 holes on the lid or neck. If the soil is not very dense, then their number can be reduced.
After this, measure five centimeters from the bottom of the container and cut off the bottom of the container using scissors or a knife. Some gardeners do not cut it off completely and leave it to protect it from debris and quickly evaporate moisture. Then the neck is wrapped with cloth and it is placed in the ground.
Hanging
Some people do not want to expose the root system of cucumbers and therefore they refuse to dig containers near the bushes. It is in such situations that it is recommended to use this method. To organize watering using this method, you must first make holes in the bottom of the container. Several holes are also made to pass the wire through which the container will be attached.
After this, a structure is mounted above the bush to secure the container. Its height should not be too high. It is necessary that the distance from the bottle to the ground is about 40 cm.
Application of attachments
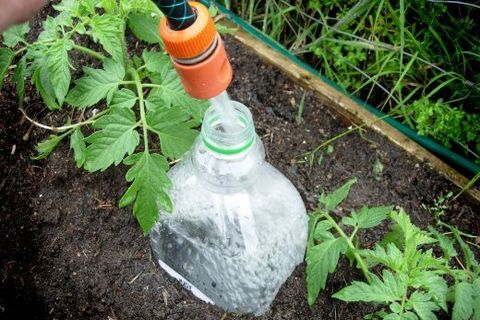
This method is the most expensive, since you will have to purchase special attachments for the bottles. Using them, you won’t have to waste your time digging containers into the ground.It will be enough just to attach the nozzle to the neck and deepen it into the ground.
Conclusion
Making your own drip irrigation from plastic bottles for cucumbers is not a very difficult job that almost anyone can handle. To do this, it is recommended that you familiarize yourself with the recommendations for creating an irrigation system and watch a video that describes the correct system and the process of creating it.

