Growing chestnuts from nuts is considered quite an exciting activity that anyone can do. At home it is quite possible to get a decorative crop or a fruit-bearing specimen. However, it is important to take into account the characteristics of the plant, planting technology and rules for further care. So, how can you grow a chestnut from a nut at home?
Popular chestnut varieties
Chestnut has many features, the main one of which is considered to be rapid growth in favorable conditions.Until a very old age, the tree bears nuts, which are suitable for obtaining new specimens.
Currently, there are more than 30 species of this crop. However, not all of them are suitable for growing on their own. It is permissible to grow the following species at home:
- Japanese - this chestnut is distinguished by its rapid development speed. Literally 3 years after planting, the plant begins to bear fruit and bear large edible nuts.
- Crenate - this tree does not grow as a shrub. This crop is characterized by a powerful trunk, which reaches a girth of 1-1.5 meters.
- American - is resistant to temperature fluctuations and weather factors. Mature trees reach 28-30 meters. Varieties adapted to the climate produce large fruits with a sweet taste.
- Chinese softest - representatives of this species reach 15 meters. They are distinguished by beautiful small leaves and edible fruits.
- Seedling - this tree can live more than 50 years. It reaches 35-37 meters in height. The fruits of seeded chestnuts cannot boast of an exquisite taste, but are quite edible.
- Low-growing - the height of this tree does not exceed 12-15 meters. It has a rounded crown. There are also specimens in the form of shrubs with a maximum height of 2 meters. Low-growing chestnuts are undemanding to soil. They are able to grow even in conditions of moisture deficiency.
Features of the plant
Chestnut is considered one of the most ancient plants on the planet. The distinctive features of this culture include the following:
- rapid growth - observed in favorable conditions;
- the ability of stumps to germinate even in old age;
- deciduous form;
- variety of species - there are shrub varieties and trees more than 45 meters high;
- brown-brown bark - sometimes it has a reddish tint, is covered with deep grooves and has thickenings on the trunk;
- oval-elongated foliage with a pointed end - it is located on the branches in a spiral, forming 2 rows;
- spherical fruits in the shape of a nut covered with a dense peel - they are distinguished by a dark chocolate color, but other shades are possible depending on the variety.
How to choose nuts for planting
Growing chestnut will be successful only if high-quality planting material is used. In this case, the seeds must meet the following requirements:
- The fruits must be ripe and fall from the tree on their own. Small unripe nuts will not germinate.
- Seeds are taken from a strong perennial crop.
- It is important that the nut is hard and whole. It cannot have any dents or damage.
When preparing planting material, it is worth considering that out of 5 pieces only one nut will germinate. Therefore, the number of seeds must be taken in reserve.
Preparing soil and nuts
For chestnut growing to be successful, it is important to properly prepare the seeds. Stratification is considered a prerequisite. If you collect nuts late in the fall and plant them in the soil, nature itself will do everything. However, at home, chestnut seeds need to be stratified.
To do this, after harvesting, the nuts need to be placed in a container with sand and put in a cool place. A basement or refrigerator is perfect for this. Experienced gardeners advise burying a container of nuts in the garden under the snow. They need to be stored in this form until spring. A week before planting, the container can be obtained.
Growing conditions
Fruit chestnuts have been grown in Russia for many years. During this time, the culture gained strong immunity and the ability to withstand harsh climatic conditions. However, the initial requirements for landing conditions remained the same:
- Sufficient amount of light - in dark places, seedlings turn out stunted and weak. Therefore, it is recommended to place pots with seeds on the sunny side.
- Drought protection.
- Moderate soil moisture.
- Exposure to heat. Pots should be protected from hypothermia, and plants that have made their way out should be protected from drafts. The suitable temperature range is +17-26 degrees.
Planting process
After choosing a location and preparing the planting material, you can begin planting the plant. To do this you need to do the following:
- To obtain one crop you need to take 6-7 nuts. For them, you need to prepare holes in the ground no more than 5 centimeters deep. It is important to leave an interval of 15-20 centimeters between seedlings.
- Sprinkle the holes with a mixture of regular garden soil and coarse sand.
This completes the landing process. In winter, planting material is dormant. With the arrival of spring, he needs to provide quality care.
Is it possible to plant at home
Chestnuts can also be grown at home. Subsequently, the crop can be moved into open ground. To plant a plant you need to do the following:
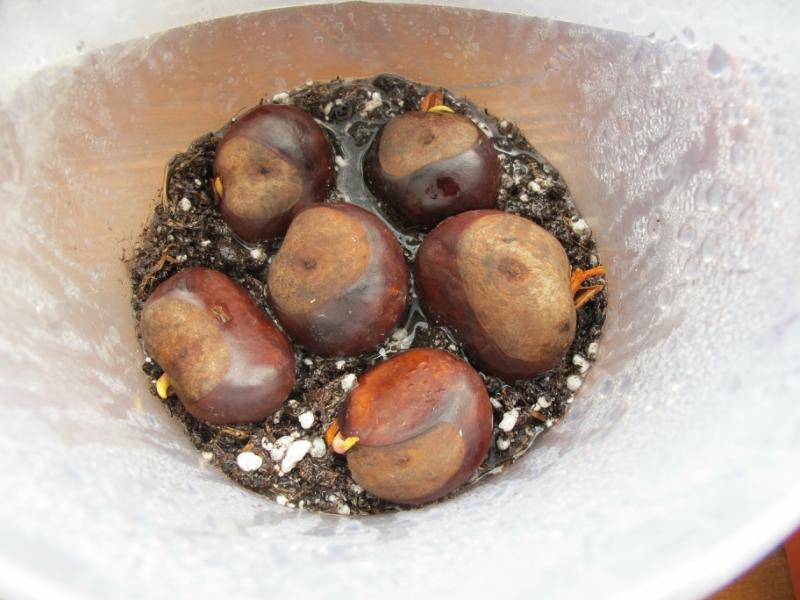
- Place the collected nuts in layers in a common container filled with moist soil. After which they need to be sprinkled with damp sand and put in the refrigerator for 2-3 months.
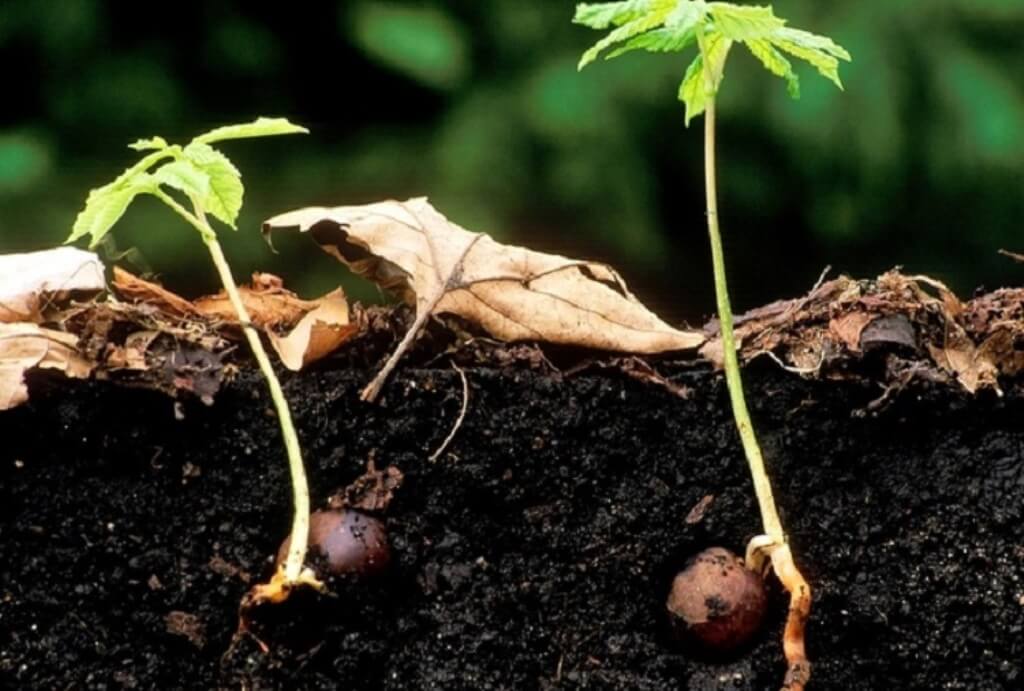
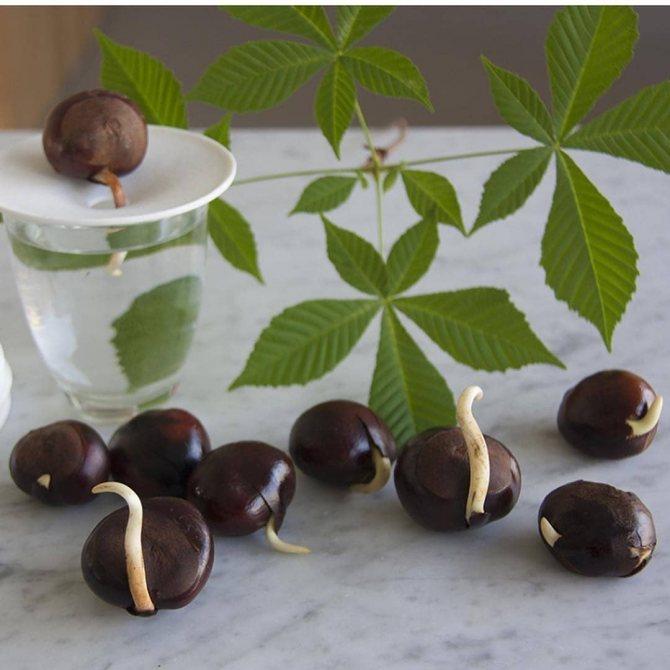
- At the end of winter, check the seed material. By this point, all the fruits should swell and produce small sprouts, which will lead to the rupture of the shell.
- Even if there are no sprouts on the nuts, they can be replanted.To do this, you will need another container filled with a mixture of garden soil and sand. The seed must be buried 4-5 centimeters.
- During the first 2 months, the soil must be systematically moistened. It is important to ensure that the soil does not dry out.
- Once the sprouts have reached at least the size of half a little finger and the first leaves appear on them, you can replant. However, gardeners advise performing this procedure no earlier than May.
Further care
After planting a seedling, it needs to be provided with proper care. It is important to consider the following:
- Young plants located in the public domain should definitely be fenced with stakes. This will help protect the crop from people and animals.
- Tie the plant so that it is not damaged by powerful gusts of wind.
- Young seedlings need regular and abundant watering.
- Every year in the spring, the tree must be cleared of dry and frozen shoots.
- Trees older than 10 years need regular pruning of branches and crown formation.
In addition, a young growing tree requires regular fertilization. It is recommended to feed the soil with compost. In addition, every spring it is worth using a solution of 1 kilogram of manure, 15 grams of urea and 10 liters of water. Trees older than 10 years do not need special care. If desired, you can engage in the formation of their crown.
Transplant instructions
Chestnut sprouts can be transplanted into open ground in May. At the same time, it is important to ensure that even, warm weather sets in and that the threat of frost passes. Before transplanting, plants sometimes need to be taken outside so that they adapt to the street air and become stronger.
When choosing a landing site, consider the following:
- The root system of the plant is superficial and grows horizontally. Therefore, you shouldn’t deepen it too much.
- The tree prefers moderately moist soil. Aridity or swampiness are not the best options.
- When choosing soil composition, it is better to give preference to chernozem.
- As the crop grows, it will acquire a tent-shaped crown, which will create dense shade. Therefore, you should not place light-loving plants near the chestnut tree.
- Chestnut is distinguished by its powerful growth. Therefore, you should not plant many small crops near it.
It is important to consider that chestnut trees are capable of absorbing many toxic elements. Therefore, they should not be grown in environmentally polluted regions. Dachas, suburban areas, and quiet places in the city are much better suited for this.
When transplanting chestnut to a site, it is recommended to take into account the following features:
- This plant is quite large in size. Therefore, the minimum interval between seedlings should be 3 meters.
- If you plan to plant grown seedlings after 2 years, in the first summer they can be placed with an interval of 60-85 centimeters.
- Provide young plants with protection from direct sunlight.
- The depth of the planting hole should correspond to the size of the plant roots. On average it should be 35-60 centimeters. The width of the hole should be 55 centimeters. It is important to give the recess a cubic shape.
- Trees can be planted in groups in one line. This is usually the perimeter of the area or the outline around the paths. You can also plant chestnuts in spots, taking into account the overall design composition of the site.
- You should not place chestnuts in pairs or in the form of a plantation. Such trees create a lot of shade and can overlap each other.This will slow down their development.
To carry out planting work, it is important to strictly follow the instructions. When transplanting chestnut seedlings into open soil, you need to do the following:
- Cover the bottom of the holes with a drainage layer. Its thickness should be 10-15 centimeters. Pebbles, sand, and crushed stone are suitable for this.
- Make a near-root substrate. To do this, you need to mix humus, sand and soil from the recess in a ratio of 1:1:2.
- Add slaked lime to highly acidic soil. This helps to improve the development of the root system at the initial stage. It is enough to add 500 grams of the substance into each well. Dolomite flour brings the same effect.
- Apply fertilizers based on potassium and phosphorus to the soil. 1-2 handfuls are enough for 1 plant.
- Place the seedling in the hole. In this case, the root collar should be located at the level of the ground surface. At the same time, the sprout must be sprinkled with substrate on all sides and the top layer must be slightly compacted near the growth point of the trunk.
- To protect the seedling from the wind, tie it to a peg. It is recommended to install the support 5-7 centimeters from the root.
- Slightly increase the height of the planting hole. Thanks to this, it will be possible to avoid exposing the trunk during soil shrinkage.
Growing chestnuts from nuts is considered a very exciting activity. To get a strong and viable plant, it is necessary to carry out planting work correctly and provide the crop with quality care.

