In any garden you can see a standard set of vegetables that everyone grows. Cucumber, tomato, cabbage, potatoes and carrots are all familiar and have been eaten more than once. But what do you do when you want to try something new? Which crop to choose? The answer to your question is extremely simple - try growing an artichoke. It deserves a special place in your garden bed. By growing it, you will be able to enjoy a new, refined taste and get a lot of benefits from it. How to grow an artichoke at your dacha, and what you need to know for this, we will figure out below.
- Main characteristics
- Varieties of artichokes
- Combination of culture with other plants
- When can artichokes be planted in garden beds?
- Growing from seeds in open ground
- Sowing seedlings
- Picking and caring for seedlings
- Planting in open ground
- Features of growing in a greenhouse
- Specifics of growing at home
- Rules for caring for crops
- Watering the bushes
- Loosening the soil and removing weeds
- Necessary fertilizers and fertilizing
- Sheltering the plant for the winter
- Protection from diseases and pests
- Harvesting and preservation
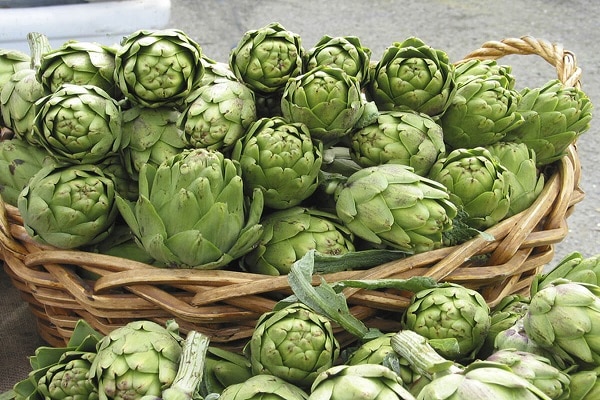
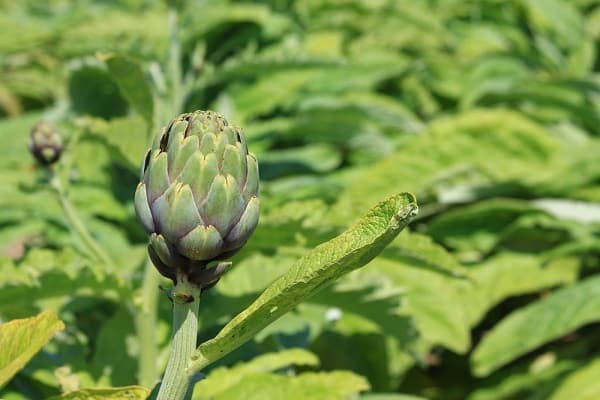
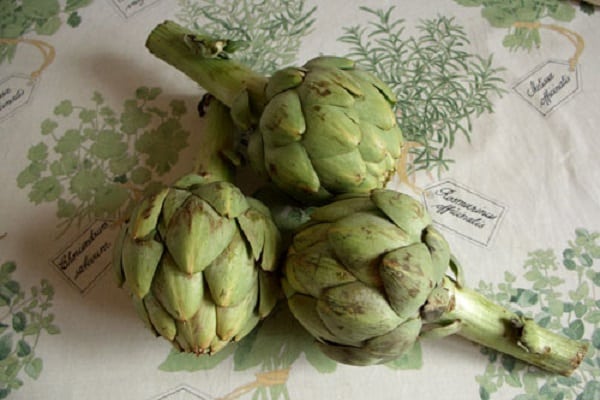
Main characteristics
Artichoke is a perennial plant that has wide, large leaves and a straight stem. More than 140 species of this plant grow throughout the world, but only 40 varieties are eaten. Summer residents who want to grow it on their site need to keep the following things in mind:
- Artichokes do not always bloom in the first year after planting. If you want to taste it, be prepared for a painstaking wait.
- The period of plant growth and development is at least 180 days. Because of this, in the central and northern regions of the country it is grown exclusively using seedlings.
- The plant loves warmth, and for normal development the ambient temperature should be 15-25 O.
The plant usually propagates using seeds, which can be purchased at any specialty store. In addition to propagation by seeds, you can use the method of dividing the mother plant, which shows good results.
Note! Artichoke heads do not grow to the required size at the same time, and this must be taken into account when harvesting.
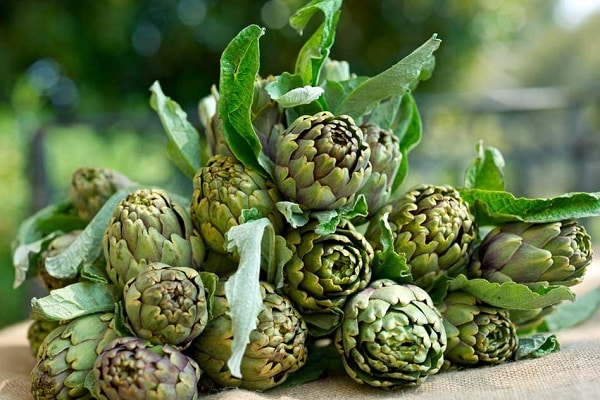
Varieties of artichokes
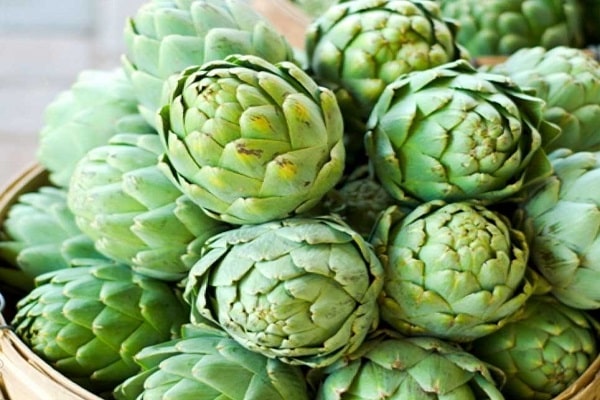
As noted above, the artichoke has many varieties, of which no more than 40 are edible. However, of these 40 varieties, about 10 are most often used in cooking. Vegetable growers around the world consider only two types to be the most delicious and healthy:
- Spanish artichoke;
- prickly artichoke.
In each type, several varieties can be distinguished that have the most favorable growing conditions and ripening periods:
- Handsome. It has gained wide popularity among summer residents, and there are reasons for that. The first of them is high productivity. This is not surprising, because the plant begins to bear fruit already in the first year after planting. The second reason lies in the relative ease of cultivation compared to other varieties. The artichoke bush of the Krasaviets variety reaches a height of about 1 meter. Up to 12 inflorescences are formed on it, which reach a mass of 110 grams.
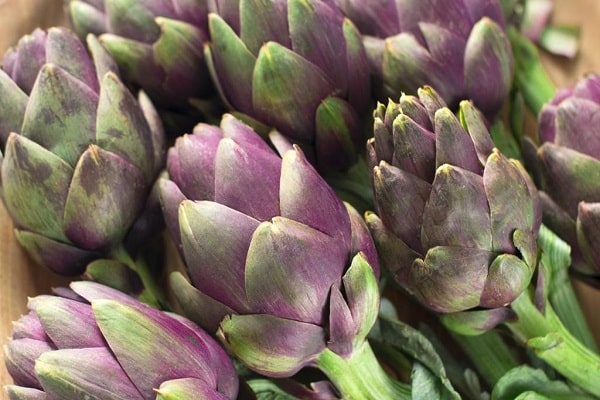
- Purple early. As you already understood from the name, the variety belongs to the early category. The bush of the plant is low compared to other crops, and grows no higher than 70 centimeters. No more than a dozen inflorescences are formed on it, the weight of which fluctuates around 100 grams.
- Sultan. The largest variety, the bush of which reaches up to 2 meters in height. The plant is mid-season and has 15 inflorescences, the weight of which does not exceed 90 grams.
- Gourmet. Like Sultan, it belongs to the mid-season varieties. The bush is quite tall, about 1.5 meters, but the inflorescences do not weigh that much. Average weight is 80 grams.
Combination of culture with other plants
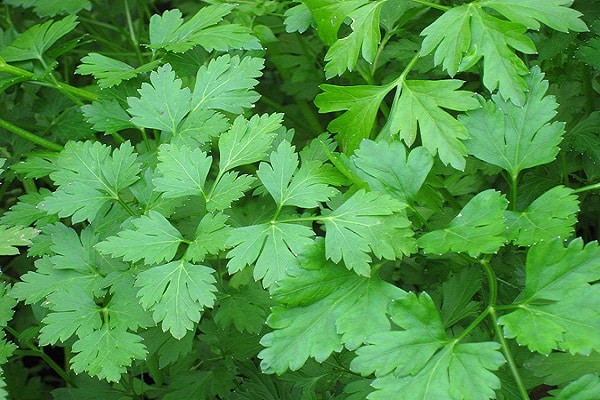
Not every summer resident knows that the yield of a particular crop depends not only on its care, but also on its environment. When growing an artichoke, it is worth taking this fact into account, because it has both “favorites” and undesirable neighbors. The “favorites” include:
- parsley;
- onion;
- celery;
- carrot;
- corn.
It is not advisable to plant an artichoke next to:
- horseradish;
- tomato;
- beans.
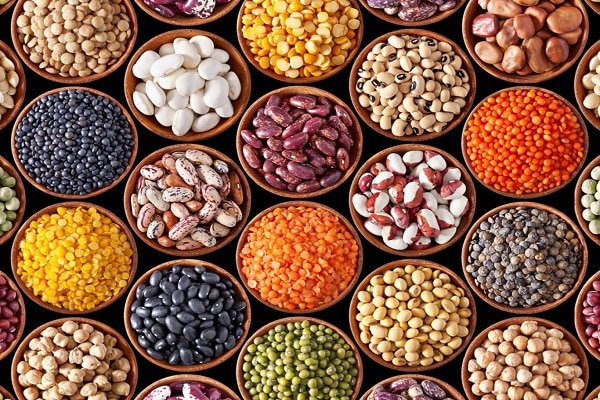
The harvest will be plentiful if the following were previously grown on the site:
- cabbage;
- legumes;
- potato.
By following these recommendations, you can grow a bountiful harvest that will decorate any table.
When can artichokes be planted in garden beds?
Planting plants in beds largely depends on the climatic conditions of the region. In places with a warm climate, the plant can be planted in beds as early as the second half of May. If your region does not have a warm climate, it is better to postpone planting to the summer. In this case, do not forget to work with the seedlings, taking them out into the fresh air. This will allow the shoots to harden and better take root in the summer cottage.
If you want to take a chance and plant the seedlings as early as possible, do not forget to cover them with cloth or film at night. This is necessary to ensure that the plants do not die from overnight frosts. A good option would be to install small metal arcs over the garden bed, over which the film will be stretched in the evening, forming a mini-greenhouse.
If we look at individual regions, the artichoke can be planted:
- in the Moscow region - mid-May, early June;
- in Central Russia - in the second half of May;
- in the Urals - early to mid-June, preferably in a greenhouse;
- in Siberia - in mid-June. It is advisable to grow in greenhouse conditions.
Important! When growing artichokes in a greenhouse, keep in mind that the plant takes up a lot of space, and the greenhouse should be spacious and high.

Growing from seeds in open ground
Two seasons are suitable for planting artichoke seeds:
- second half of autumn;
- end of spring.
To do this, holes 4 centimeters deep are dug in the garden or vegetable garden. Several seeds are placed in each hole and covered with soil. Between the holes you need to maintain a distance of 70 centimeters. Artichokes grown in the south can be planted over long distances - from 90 to 130 centimeters.If you grow crops in this way, you will be able to taste the fruits only in the second year after planting.
Sowing seedlings
For summer residents growing this crop for the first time, one packet of seeds will be enough for planting. It is advisable to limit yourself to one variety and have a good understanding of the peculiarities of its cultivation. Seed preparation begins in the second half of February, several weeks before planting. Sowing seedlings is done like this:
- The plant seeds are placed in water for 11 hours.
- Water temperature is room temperature.
- After the seeds have swollen in water, they are placed on damp gauze and wrapped in it. The top of the gauze can be covered with film to prevent moisture evaporation.
- In this form, the seeds are stored in a warm place for 5 days.
- After the specified period, the package with seeds is put into the refrigerator. This must be done if you want to get a harvest in the first year after planting.
- Next, you need to prepare containers in which the seeds will be planted. To do this, prepare a mixture of humus, sand and turf soil.
- In prepared containers filled with soil, we make small grooves. The depth of the grooves should not exceed 4 centimeters.
- Seeds are planted at intervals of 4 centimeters from each other. This must be done carefully so as not to damage the hatched sprouts.
- A centimeter layer of soil is applied on top of the seeds, which is slightly moistened with a spray bottle.
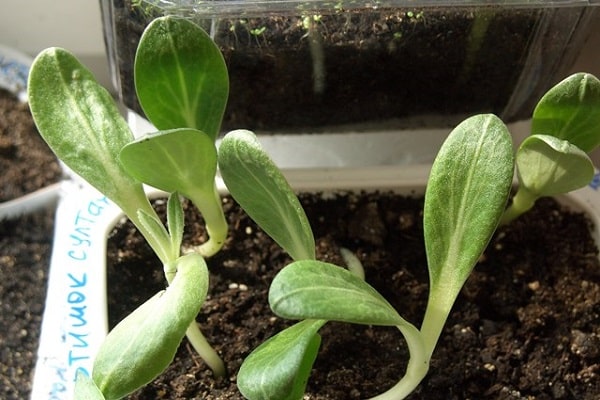
- As soon as the sprouts have hatched above the ground and their first leaf has formed, the seedlings need to be removed to a cooler place (temperature - up to 15 O) and install lighting next to the pots. This should happen approximately two weeks after planting.
Make sure the soil has moderate moisture. Do not dry out the soil or over-moisten it.
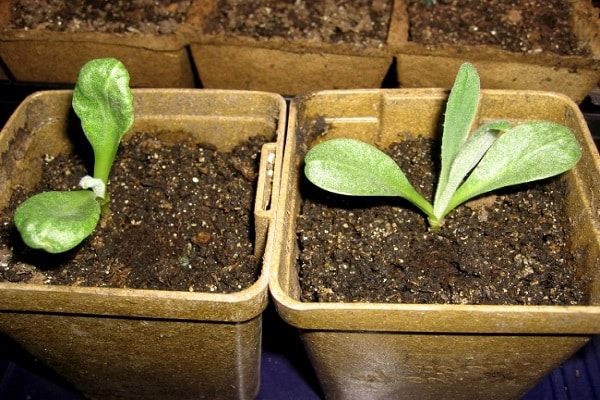
Picking and caring for seedlings
Plant picking is done in cases where the seedlings were grown in one container. Pots with a volume of 0.5 liters are perfect for picking. Picking is performed as follows:
- Soil consisting of sand and humus is added to the pots. A depression is made in the center of the container, which is watered.
- Plants grown in a common box are watered and removed one at a time.
- The main root of each seedling is pinched, after which they are planted in prepared pots.
- The finished pots are watered and put away in a warm place.
- 14 days after the plants are planted in separate pots, they are fertilized with mullein, which is diluted in liquid. The proportion is 1 to 10.
- After this, we wait another 14 days and add a complex of mineral fertilizers to the soil.
Plants need to be taken out into the open air to harden them off. It is advisable to do this in warm, windless weather.
Planting in open ground
There are two ways to grow seedlings in open ground, depending on the purpose for which the artichoke is planted:
- for eating;
- For decoration.
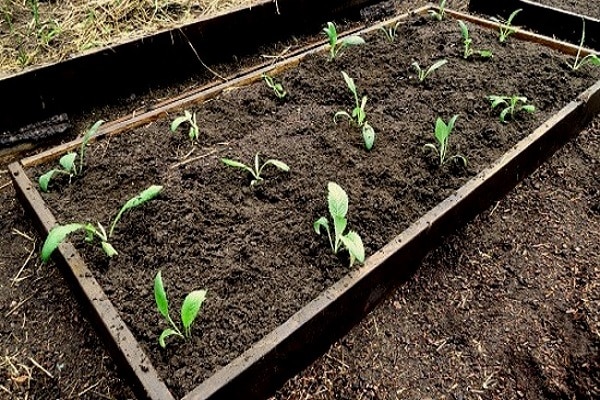
If the artichoke is grown for food, planting is carried out in the garden:
- The soil in the area chosen for planting is dug up and fertilized.
- Humus, potassium sulfate and superphosphate are used as fertilizers. Humus must be added at the rate of 10 kilograms per 1 square meter.
- Beds are made, the height of which is at least 20 centimeters.
- The distance between the beds is 1 meter.
- It is advisable not to plant plants closer than 80 centimeters from each other.
- The beds must be watered and the ground covered with straw.
If the plant is grown for beauty, for example, in the garden, the planting algorithm changes slightly:
- Select a place that will be visible and easy to get to.
- At the planting site, a deep hole is dug, which is filled with compost and soil, mixed with turf.
- The diameter of the pit is 75 centimeters.
- The depth of the pit is 50 centimeters.
- The distance between pits is at least 1.5 meters.
- The plant is planted in a hole in a special peat pot.
- The pit is watered and covered with a layer of straw.
In both cases, the landing site should have good access to the sun, which should not be blocked by any other objects. The site should not be exposed to much wind and have dry soil.
Due to the structural features of the root system, which is well developed in artichokes, the roots will rot if there is excess soil moisture. This will lead to the death of the plant. For planting, it is advisable to choose a place on the south side of the site.
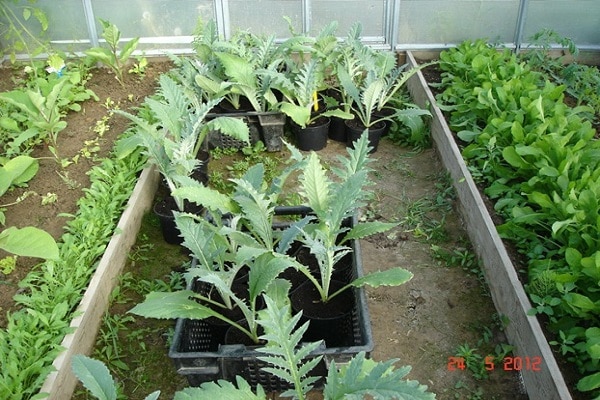
Features of growing in a greenhouse
When growing a plant in a greenhouse, there are several facts to consider:
- The artichoke reaches a decent size. Some varieties grow up to 2 meters in height. It follows from this that the greenhouse should be spacious;
- the room temperature should not fall below -2 O, otherwise the plant will die.
Otherwise, the care requirements in greenhouse conditions do not differ from normal ones.
Specifics of growing at home
It is possible to grow only artichoke seedlings at home. The plant itself, due to its size, is extremely difficult to grow in an apartment. To grow seedlings, you must comply with the following requirements:
- Water the seeds well.
- Before the first leaf appears, the temperature in the room with seedlings should be at +25 O, after which the temperature drops to 12 degrees.
- A few days before planting, the seedlings are taken out into the fresh air, thereby hardening them.
Rules for caring for crops
No special conditions for caring for artichokes are required; it is enough to fulfill the following requirements:
- water the bushes on time;
- loosen the soil and remove weeds;
- fertilize the beds.
Otherwise, the crop does not require additional time, and growing it is not difficult.
Watering the bushes
Watering is carried out in the afternoon. You can adhere to one of the following schedules:
- water the bush every other day with a minimum amount of water;
- water once every two weeks, spending up to 5 liters of liquid on the bush.
Regardless of which mode you choose, pay attention to soil moisture. It should not be excessively dry or wet. Otherwise, it will affect the growth of the plant and the quality of the harvest.
Loosening the soil and removing weeds
It is best to loosen the soil the next day after watering. This way you will give the plant access to oxygen, and it will develop harmoniously and correctly. During loosening, weeds are removed. This must be done until the plant is fully strengthened and comes into force.
After weeding can be done as desired. However, you shouldn’t push the plant too hard in any case.
Necessary fertilizers and fertilizing
Feeding the bush and fertilizing the soil have a positive effect on the plant, and are necessary not only when growing seedlings.
During the growth process, you also add mineral fertilizers, and this continues until the end of the bush’s life cycle. The complex of fertilizers remains the same, and another type of feeding is added to the adult plant, which is called “foliar”.It is carried out by spraying the bush with a nutrient solution of the following components:
- wood ash – 1 teaspoon;
- superphosphate – 1 teaspoon;
- potassium chloride – 3 teaspoons.
Such bait not only has a positive effect on the harvest, but also protects the crop from pests.
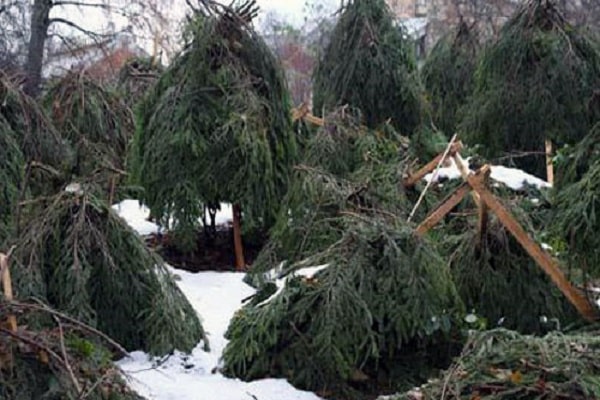
Sheltering the plant for the winter
To cover a plant in open ground you will need:
- Trim the plant's stems, leaving only 30 centimeters from the ground to the tip.
- Cover the bush with burlap or other fabric, for example, composite fabric.
- Sprinkle the ground around the bush with a layer of straw or sawdust. You can use fallen leaves. The layer should be 30 centimeters thick.
- After snow falls, you can rake it from nearby areas, covering the base and roots with a dense snow cap.
Protection from diseases and pests
Diseases that affect the bush are petal rot. Various types of aphids and slugs eat greens with particular pleasure. To combat them, the bush is treated with special preparations. This needs to be done in the spring.
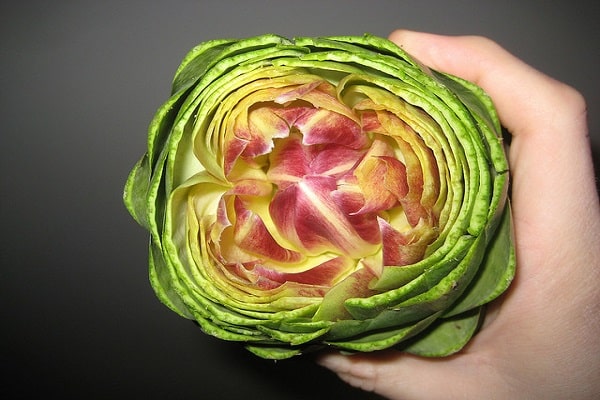
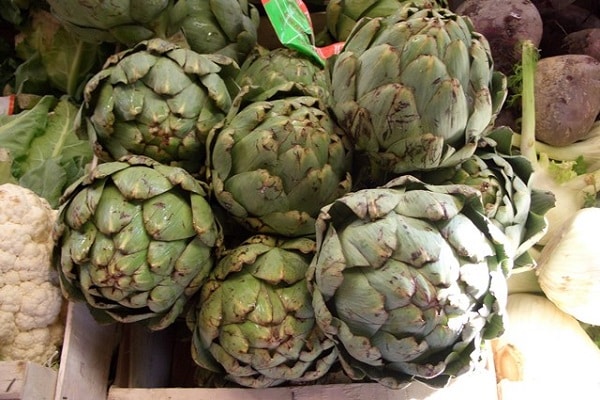
Harvesting and preservation
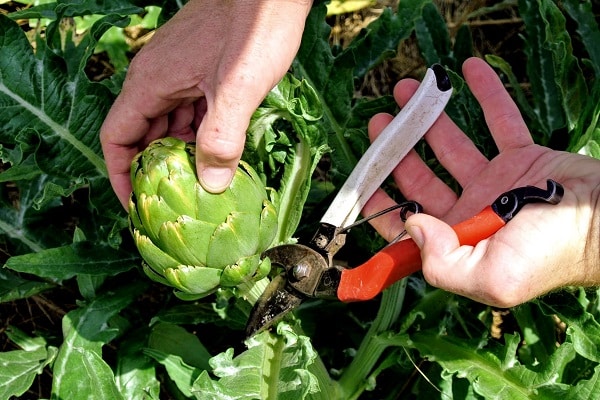
You need to harvest according to the following algorithm:
- Once the top of the cone begins to open, you can harvest the fruit for consumption.
- It is advisable to leave no more than 3 flower stalks on the bush, on which 4 baskets will be located.
- You need to cut the artichoke in such a way as to capture some part of the peduncle.
Do not delay harvesting until the plant blooms; if this happens, the fruits will be too hard and unsuitable for eating.
Collected fruits are stored for no longer than three months at an ambient temperature of 1 O. If the storage temperature is higher and does not exceed 12 O, the fruit can remain edible for up to 4 weeks.